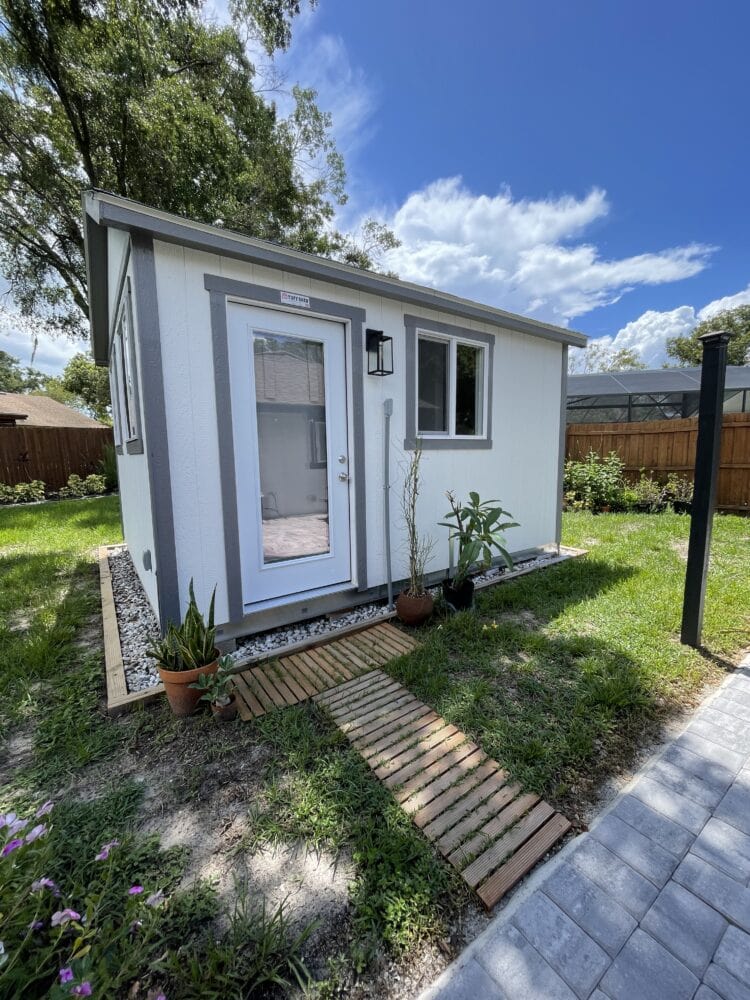
Having a she shed seems to be a common wish among women working from home. But have you ever wondered what it would take to make your she shed office dreams a reality? With both my husband and I working from home now since the pandemic, having separate offices at home has become a necessity. Which is why I built a she shed office in our backyard this year.
How 2020 Changed Work From Home
We bought our home at the best time and the worst time. It was March of 2020. And at the time I had a serious five alarm melt down panic about purchasing a home and making such an investment while the whole world was shutting down. But in hindsight, it was one of the best decisions we ever made. Home prices have gone up over 20%, and that’s even if you can find a home and win the bidding war to purchase it.
The only downside to our lovely new renovated home is that it’s small, only about 1500 square feet. Initially it seemed like plenty of space for me and my husband. But we’ve learned it’s not quite enough space with the two of us working from home.
Since my husband has frequent face-to-face zoom meetings, he took the spare bedroom office with a closeable door. As for me, since I had to pivot hard from travel to mostly food in 2020, I set up my office in the dining room. It seemed perfect when we first moved in as the dining room was close to the kitchen and great for food photography. But it lacked privacy when I needed to focus. And there was no real place for visitors to sit or for us to host dinner without completely packing up my whole office and stuffing it into a closet.
While working in the dining room was fun for the first year we lived in our new home, it wasn’t a good long term solution. That’s why we decided to build a Tuff Shed and turn it into livable office space.
If you’re researching how to build your own she shed office, I outline all my lessons learned, costs, time it takes to build, and a few important questions you should consider.
CAN I USE A SHED AS A HOME OFFICE?
First question, can you use a shed as a home office? Absolutely! But there are things you’ll need to consider such as the integrity of the building, the size of the shed, and adding electricity and climate control for humidity (because … electronics).
For these reasons, we decided to build a new shed so it would have a solid roof and foundation to create a comfortable home office space.
WHAT TO CONSIDER WHEN BUILDING A SHE SHED OFFICE
While the photos of she sheds online can look quite dreamy, there’s actually a lot to consider before beginning this backyard project. Here are a few questions to get you started.
1 – Use Of Space
What do you plan to use the space for? Personally, I needed extra storage space for food styling prop. Plus I wanted a well lit area for a desk and computer. In addition to storage, lighting was important to me for writing and also Zoom and video calls. When sketching out the layout of your shed, think about the placement of furniture, windows, and any shelving or storage you’ll need.
2 – Size Of She Shed
What is a good size for a she shed? That all depends on your answer to the previous question – what will you use the space for? Once you have your use of space sketched out, that should give you a ballpark idea on the overall size of your shed. Something to consider, when adding 2’x4’ framing and drywall, that will take away from your overall square footage. For instance, a 10’x10’ shed measurement on the outside will be approximately 9.5’ x 9.5’ once finished on the inside.
3 – Location Of She Shed Office
Where do you plan to build your she shed office? Our backyard is huge, but once we learned about our county set back requirements (the distance we could build from the lot line), that shrunk our available building space quite a bit. The county where we live has a required set back from the lot line of 10 feet, which is quite a distance. A large yard seems a lot smaller when you measure out 10 feet from the fence line all around. And it also affected the size of the shed we could install and the placement of the shed in the yard. Check with your city or county regarding lot lines and set backs.
In some cities and counties, you can apply for a variance to the set backs, which Tuff Shed advised us we could do if we wanted the shed tucked closer to the fence. But that would have added an additional 30 days to our overall construction time as we would have had to wait for county approval. Plus, approval isn’t guaranteed.
WHAT IS THE AVERAGE COST OF A SHE SHED OFFICE?
This question is the one I get most often, and the answer entirely depends on the size of the shed you build and what materials you choose for inside. Tuff Shed has a fun design tool where you can play with the style and specifications to get an idea of what the cost will be. It’s quite fun to use, but you’ll need to keep in mind the additional expenses of finishing out the inside with drywall, flooring, electric, etc.
Overall, if you’re looking for just a ballpark estimate, I’d say whatever you spend on your shed build, double that for the total cost of finishing it out. For example, if it costs $12,000 to build your shed, the overall cost will be around $24,000 to have it completely finished inside. And whatever that estimate is, add 10% on top of that for any variables in construction, such a material cost. If you’re able to do the work yourself, you might save a little in labor. But for more definitive examples, I’ve outlined the cost to build our shed below.
BUILDING A SHE SHED OFFICE
1- Choose A Shed Builder
Not all sheds are built the same. And most prefabricated sheds available in stock at your local hardware store or home building store will not meet most building codes for creating a livable space, such as a climate controlled home office. Here are the two options we considered.
Studio Shed
I researched Studio Sheds and even had a few of their models on my vision board. Truly, they’re beautiful buildings. But at the time I was looking to build a she shed office, it seemed the only construction option for Studio Shed was to hire a contractor to build it for you as Studio Sheds are constructed in Colorado, packed flat, and shipped to your door. I can barely put together Ikea furniture, let alone a whole building. And hiring a contractor to build a Studio Shed would have been an additional expense on top of an already expensive shed. Plus, with the way the housing and construction market has been, I wasn’t sure I’d be able to find a good contractor that was available for a small backyard project.
The other variable was the Florida hurricane building codes. There was nothing on the Studio Shed website at the time I was researching that guaranteed the construction of the shed would meet Florida’s strict building codes (because … hurricanes). The photos of Studio Sheds online look sturdy enough to withstand any weather. But without any permitting guarantees, that wasn’t a risk I wanted to take.
Tuff Shed
One of the things that attracted me to Tuff Shed was that they had a local office in Orlando where I could actually speak to someone in person to answer any questions or concerns we had about the building process.
My husband and I visited the local office where we were able to walk through a few Tuff Shed models to get a feel for the size and construction. Plus, our contact there, Ashley, was absolutely wonderful in answering our questions. Tuff Shed handles the building permits, builds the shed at their warehouse in Orlando, then assembles the shed on site.
First we considered the Premier Pro Studio Tuff Shed model. The clerestory style roof matches our home and the overall style looks amazing. But the double French Doors limited interior space usage. Plus we needed a more traditional layout with a single door so we could add an extra interior wall for storage space.
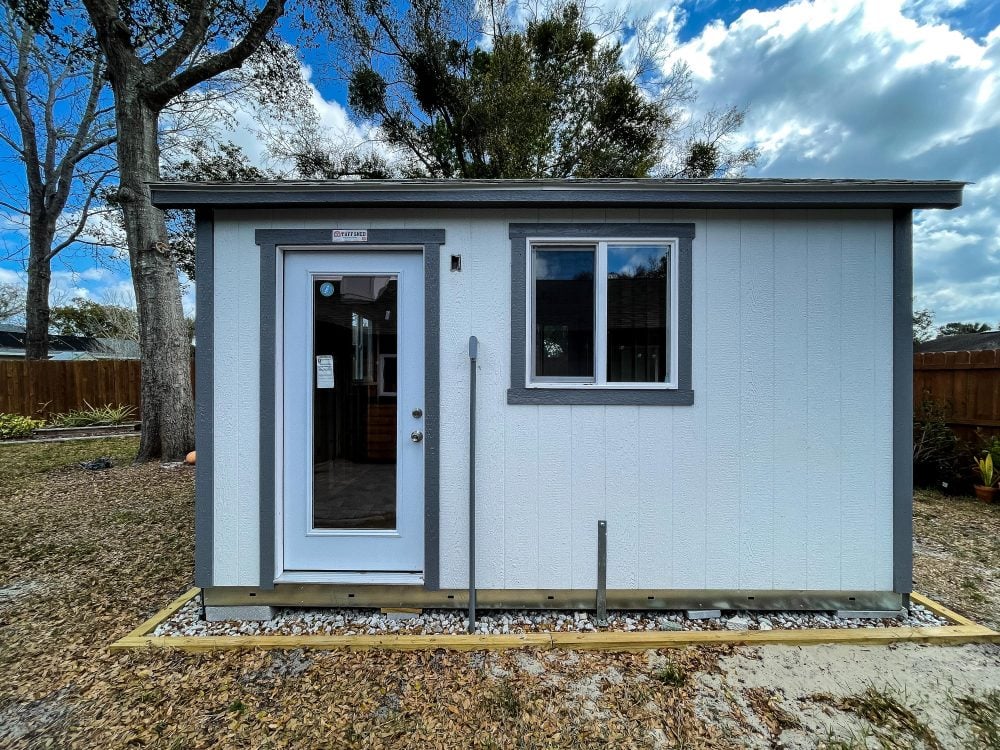
Ultimately, we decided on a 12’x14’ Premiere Pro Tall Ranch shed, modeling our design after an example on Tuff Shed’s Blog, Natalia’s she shed office. We added four windows facing the yard to provide plenty of natural light, with a solid wall backing up to our closest neighbor for privacy. For a 12’x14’ shed with an extra interior wall framed out to form a closet, the total cost was $13,500.
2 – CHOOSING A FOUNDATION TYPE
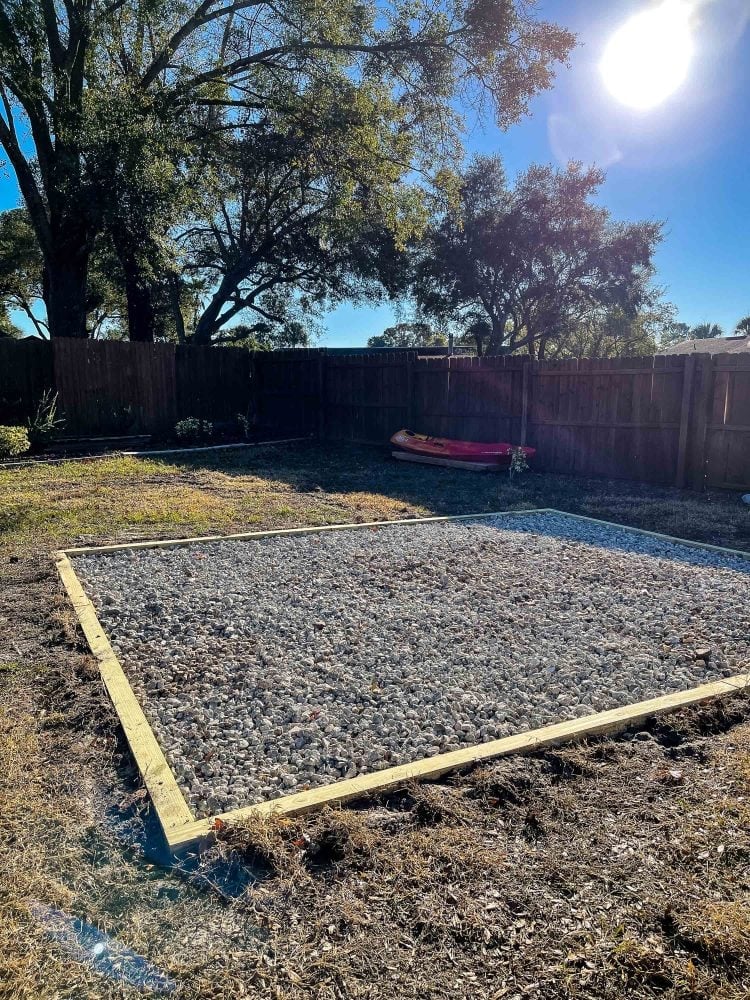
Does a shed need a foundation? Technically, you could probably build a shed right on your lawn. I’ve also seen examples of she shed offices built up on a platform with a deck. But with our tropical weather in Florida, we wanted to have a more definitive foundation. We considered a concrete slab, but with the rise of concrete costs, we chose a gravel bed instead.
The first quote I received for gravel was over $6,000 and included stump grinding and a thin plastic landscape edge to hold in gravel. I got a second quote from a landscape company we had worked with before and they suggested using recycled concrete instead. They created a more solid frame with pressure treated 4’x4’ posts reinforced with rebar, thick landscape fabric, and 4 inches deep of recycled concrete. Tuff shed added anchors that go 3’ in the ground to secure the building too. Overall cost of a framed out recycled concrete foundation: $2,500. And lesson learned: get multiple quotes.
3 – ADDING ELECTRICITY TO YOUR SHE SHED
We hired an electric company we had worked with before and they were wonderful in explaining the process. Here are some things you’ll need to consider for your she shed office:
- How many outlets do you need? Would you like any of them to have usb ports? Do you want any exterior outlets for landscaping or market lights?
- What kind of lighting will you have? LED can lights in the ceiling? Or something centered in the middle of the she shed such as a chandelier or ceiling fan?
- What kind of exterior light will you have? Do you want more than one?
- Where will the circuit breaker panel be located (I confess, I didn’t know I’d need one in the she shed).
- How will the power be routed underground from your home circuit breaker? Are there any obstacles in this path (tree roots, patios, etc).
- Will you want an outlet for a security camera? If so, where will this be located?
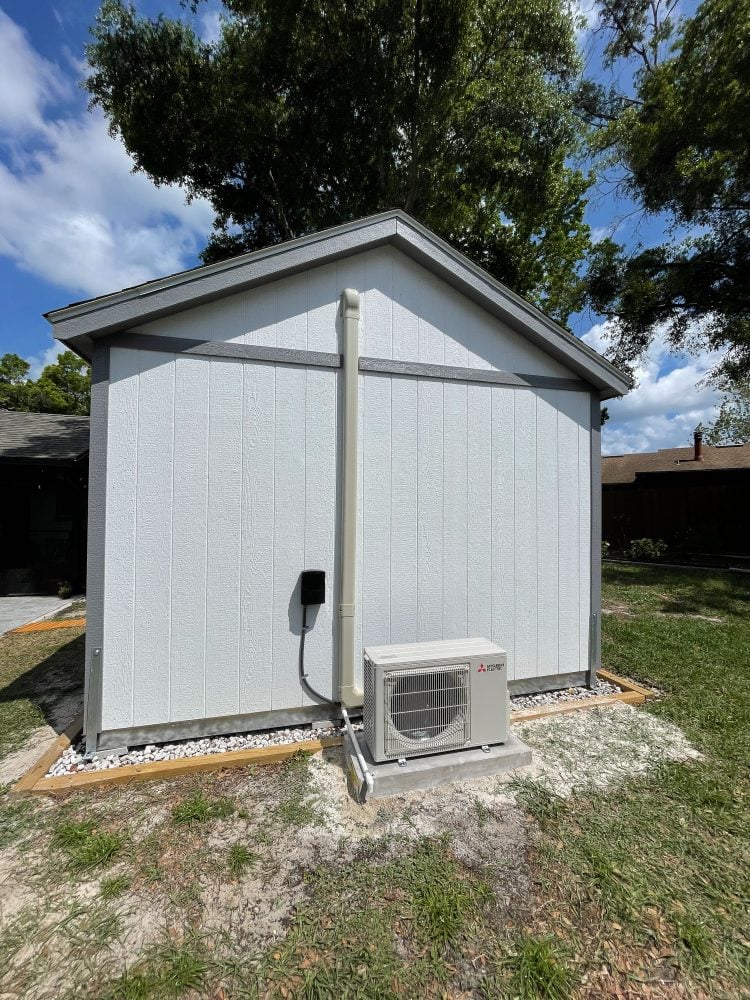
- What type of air conditioner will you use? Wall unit or mini-split? And what are the electric requirements and ideal placement for this unit?
For the outlets inside, think about the placement of your desk, lamps, electronics charging station, and anything else you intend to include in your office that will need electricity. Mini fridge for cold drinks? Coffee maker? Add those items to your overall office sketch.
Because we added a partition wall inside to create storage space, this limited where we could place the breaker panel since it could not be located in or near a closet according to code. I had envisioned that it would be on the back of the building, out of site from our patio area. But where we ended up having to place the power running from the ground to inside the she shed is noticeably in the front. We plan to paint it and have a well placed plant in front of the pole to hide it a bit.
The cost of adding electricity to your she shed office is dependent on the size of your shed, type of A/C unit you choose, and the distance to run electric underground, so the quotes may vary. When you get quotes for electric, ask what all is included? Ours included permitting, inspections, material and wiring, and the breaker box and connection for the A/C. It also included a smoke detector, the actual outlets, a USB outlet, switches, and ceiling lights. However, I purchased the exterior porch/door light separately. The cost to add electricity to my she shed office: $3,800.
AIR CONDITIONING
In Florida, or anywhere lately with the kind of summer heat we’ve all been experiencing, air conditioning is a must have. Especially if you’re building a she shed office where you’ll have a computer and other electronics.
The options for air conditioning a she shed include using a window unit, which is relatively inexpensive and can be built into the wall (as opposed to resting in a window). Or you can have a mini-split air conditioner installed.
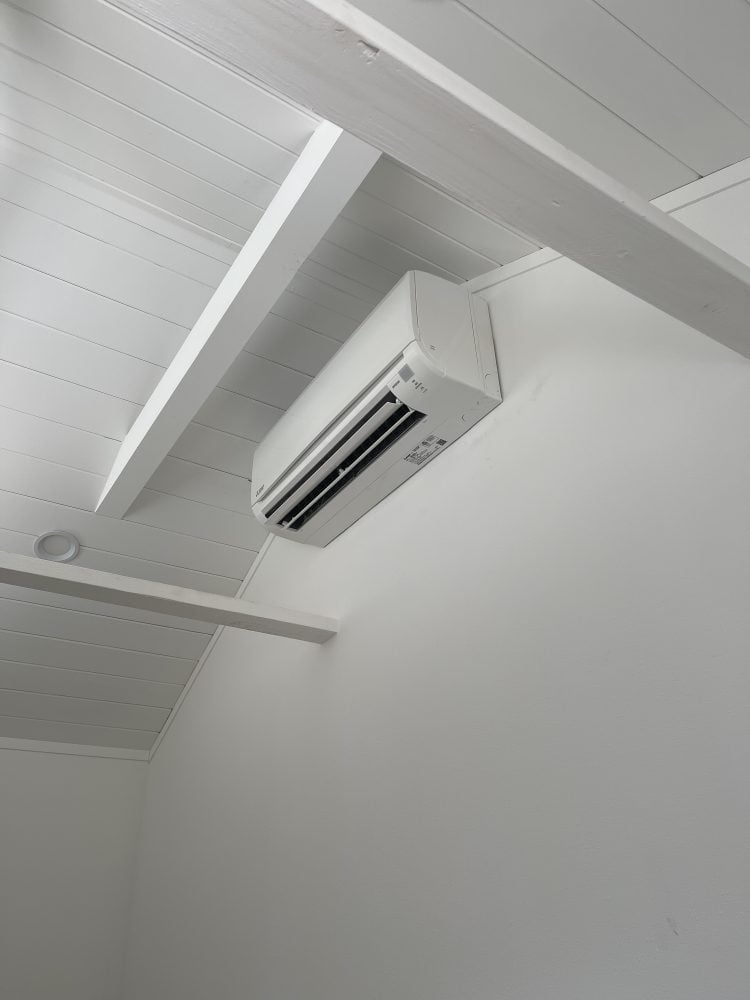
I was concerned about security (having a hole cut in the wall large enough for a person to crawl through). But I had also read that mini-splits are more efficient at lowering humidity (a plus in Florida!) and that they’re more quiet and energy efficient. So we decided to have a mini-split installed.
Air conditioning is the one she shed construction cost that really surprised me. So much so that I got 5 quotes and they all came back in the same range: $4,500 – $5,500. I had researched the cost of mini-split units, and they were around $1,500. But the cost of installation also includes energy efficiency and size calculations required for permitting, and additional materials for install.
TURNING A SHED INTO AN OFFICE
If you’re handy, adding drywall, flooring, and trim is something you could do on your own to save on costs. But drywall and installing floors is not in my skillset, so this is something I hired out. Things to consider for your she shed office build:
- What type of flooring will you use?
- Do you have a preference on baseboard style, size, and trim?
- Would you like wood framed window sills or the modern clean look of drywall?
- How do the light fixtures you chose affect the ceiling? Do you need to purchase any lights?
- Will you use the shed door or install a custom door?
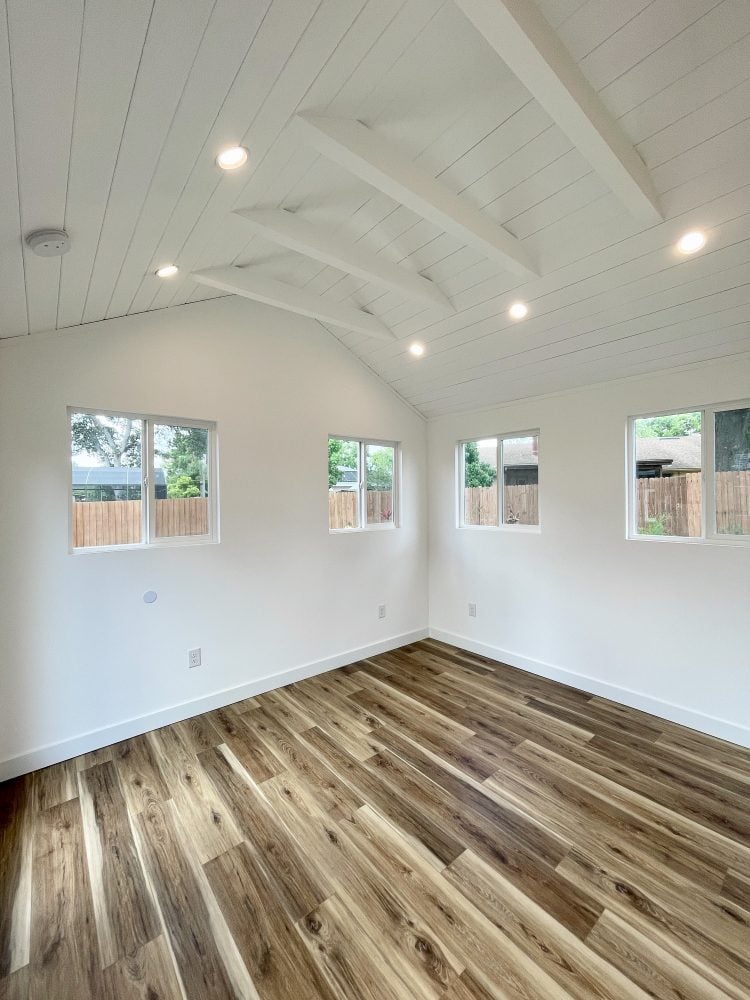
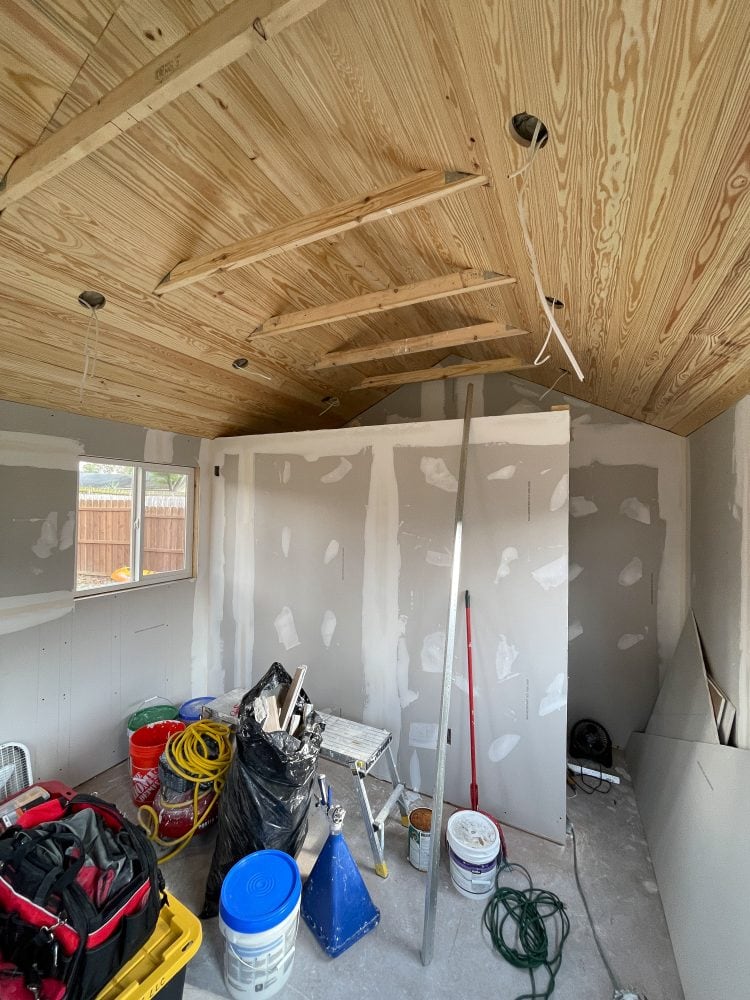
My she shed office ceiling was modeled after an example on Tuff Shed’s blog. I loved the way the ceiling looked with tongue and groove panel and how the beams built into the roof were accentuated with a wood wrap. Instead of a mid-century chandelier, I chose can lights, which seemed more simple, but cutting those small holes in the wood complicated things a bit.
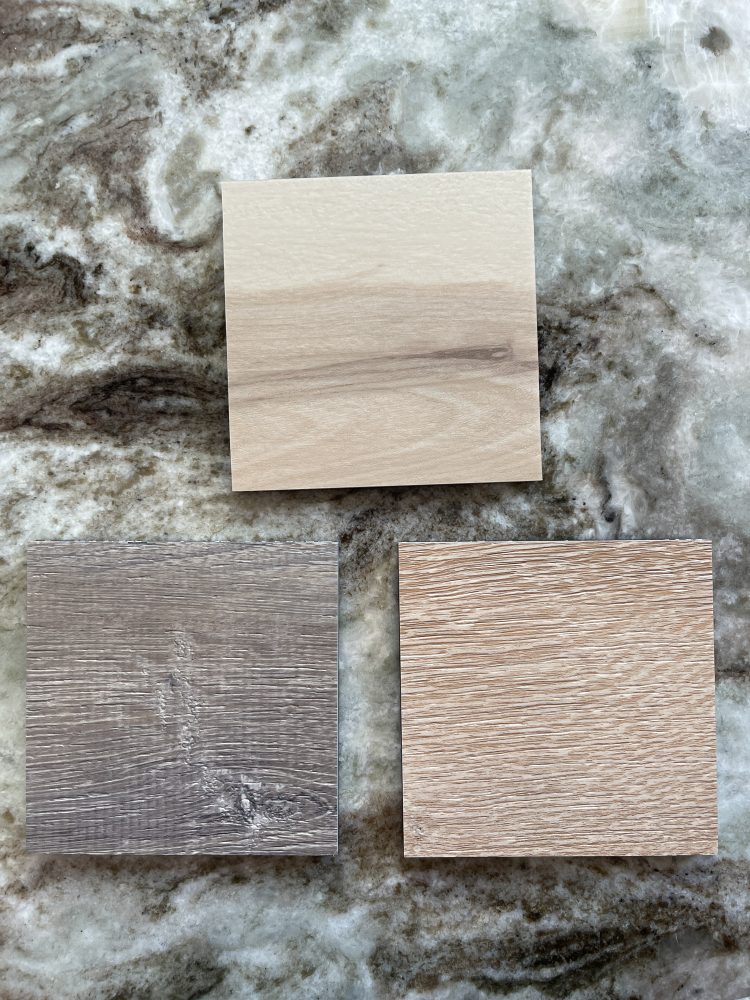
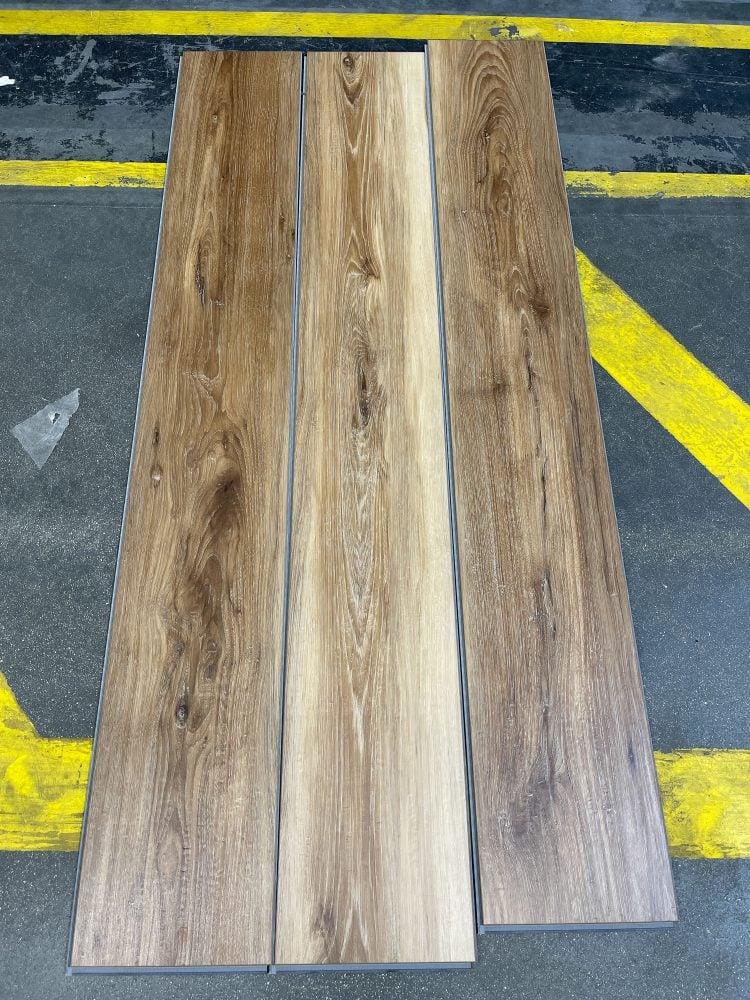
For flooring, I chose LifeProof vinyl planks in the color Sundance Canyon Hickory. It looks like real wood, but is more durable.
When hiring a company, ask lots of questions. Take a look at their past work (especially if they’re revonnaved other sheds). Ask for a quote up front, and mentally add 10% to that for any variation in the cost of materials.
As for costs, a simple build out with insulation, drywall, floors, baseboards, and door trim starts at around $5,000. But the more finishes you add (such as wood ceilings), the cost can get higher depending on materials.
HOW LONG DOES IT TAKE TO BUILD A SHE SHED OFFICE?
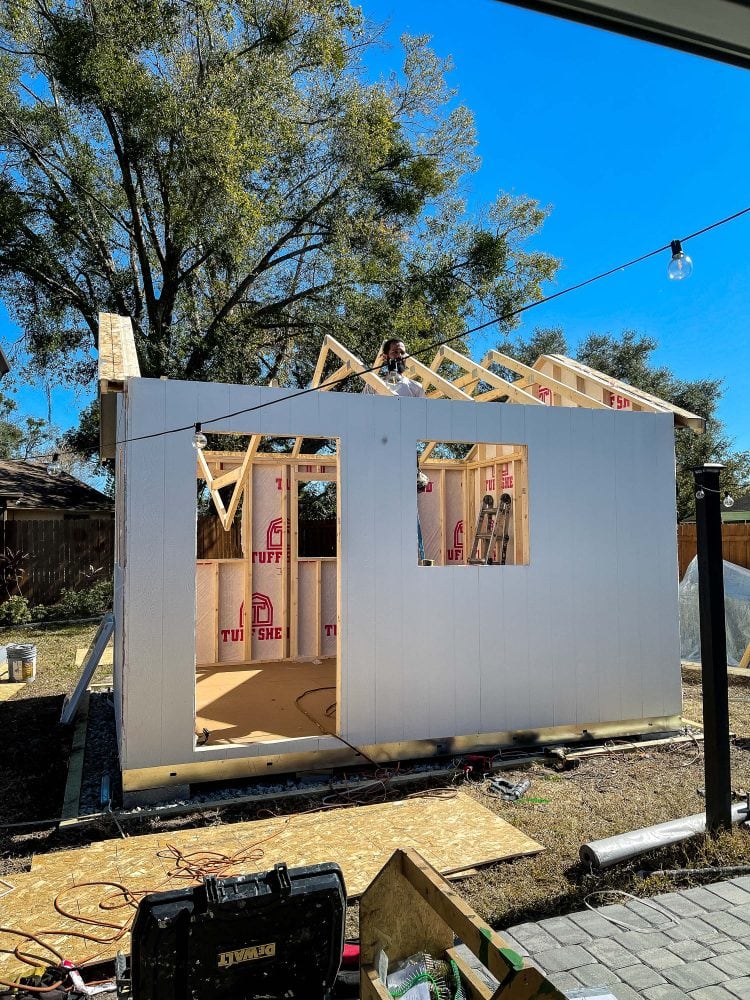
For the Tuff Shed portion, the structure seemed easy. Once we signed the contract, Tuff Shed had the permit pulled and the building ready to schedule for assembly on site within about four weeks. We had to wait an additional week to coordinate having the foundation completed and work site prepped for Tuff Shed to build on.
After that, I naively thought the whole shed would all be done in about two months total considering how fast Tuff Shed was at building. Timing is really about coordinating schedules of various contractors and inspections.
BUILDING A FOUNDATION: 1-3 Days
This depends on if you choose concrete, or gravel like we did.
SHE SHED CONSTRUCTION: 4 Weeks
Tuff Shed pre-assembled quite a bit at their warehouse. So from the time we signed the contract, they were ready to deliver the shed and assemble it in about 4 weeks. But the time it takes them to build on site? Only a day! There were a couple of things I requested after they were done, simply touch up paint on a few places that need it and to adjust the lock on the door. The customer service has been great and they immediately scheduled a warranty claim to do those two finishing touches.
ELECTRIC: 3 Days to 1 Month
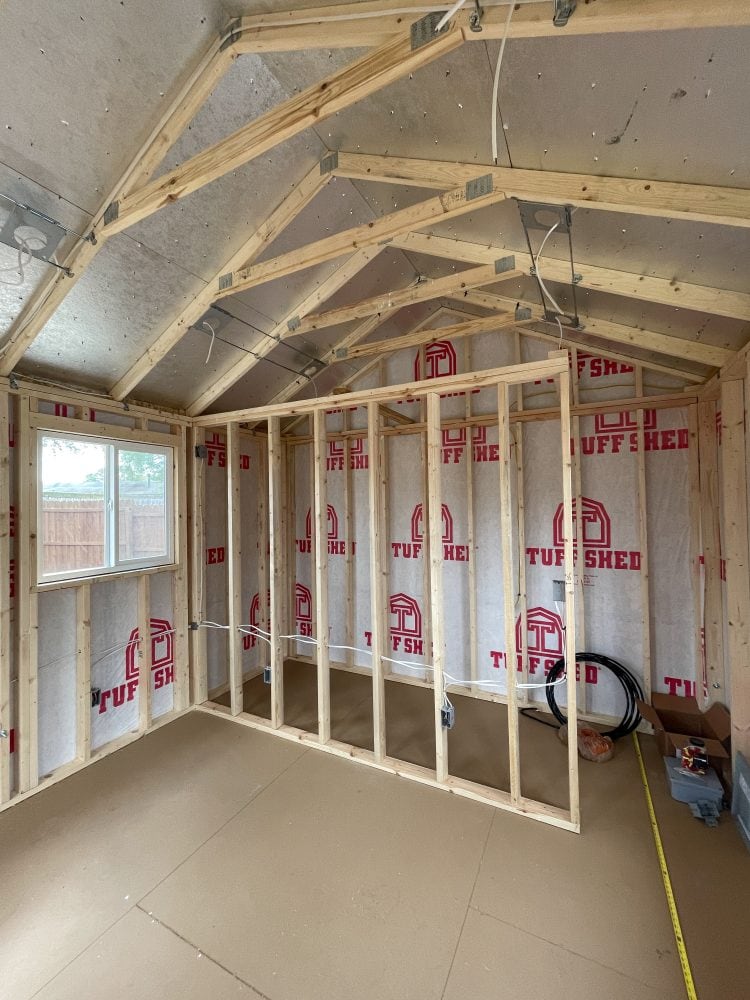
Each portion of the electric only took about a day. But those were three days spaced apart by inspections and drywall, which is why I have one month listed above. It took one day for them to run wire through the building, one day to run wire underground to the shed, and one day to connect it all together with lights, outlets, etc. after the drywall and floors were installed.
INSPECTIONS: 4-5 Days
There was an inspection after Tuff Shed finished assembly. It was first thing in the morning after the shed was complete and lasted only 15 minutes.
Something to consider though, and I’m sure your electrician will review this with you, is that there are multiple electrical inspections.There is one to inspect the wiring before the drywall is added, one to inspect the wiring underground, and one final one when the build out is finished. Each of these inspections were on separate days, but only lasted about 15 minutes.
Finally, there is one final inspection after the A/C is installed (should you choose a mini-split).
INSULATION, DRYWALL, AND FLOORING: 10 Days
Insulation is added first, followed by drywall, texture, flooring, trim and paint. The wood ceilings I chose added a bit of extra time. And there is some “wait” time within those ten days as drywall, caulk, and paint have to dry.
TOTAL TIME TO BUILD SHE SHED OFFICE: Approximately 3 Months
Overall, from start to finish, it took 3 months. I signed a contract with Tuff Shed at the end of December and the shed was move-in ready with lights on at the end of March. Within that time there was a lot of “wait” time, waiting for texture, drywall mud, paint, etc to dry, or waiting for inspections.
Now, with supply chain issues, let’s see how long I have to wait for furniture! Here are some renderings from Modsy for my she shed office design.
3 MONTH UPDATE!
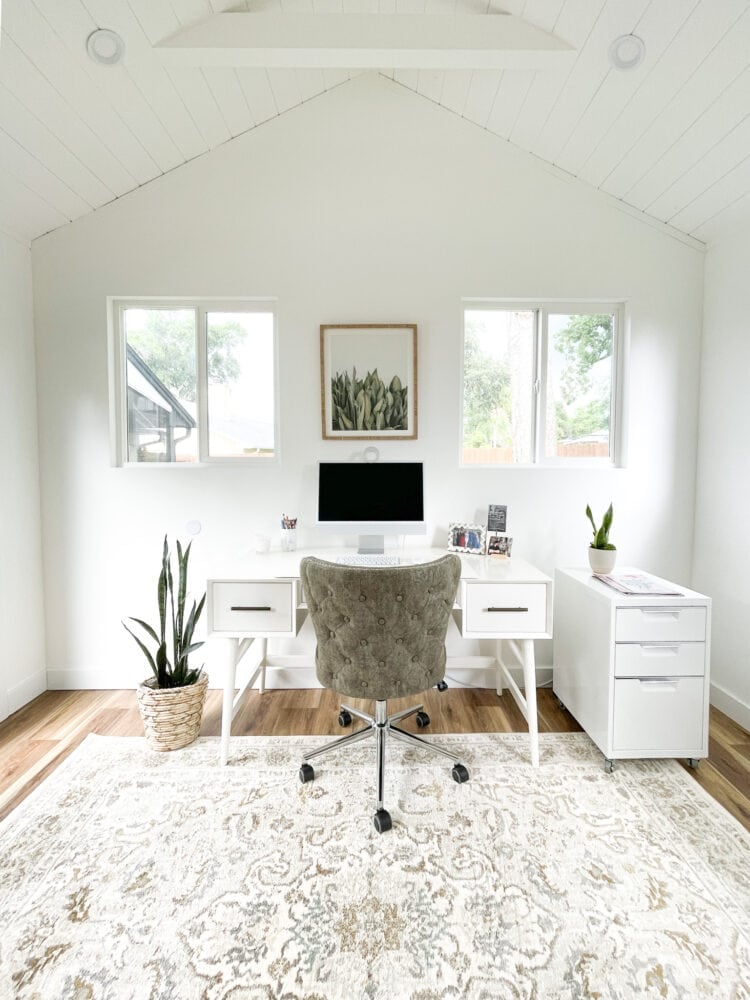
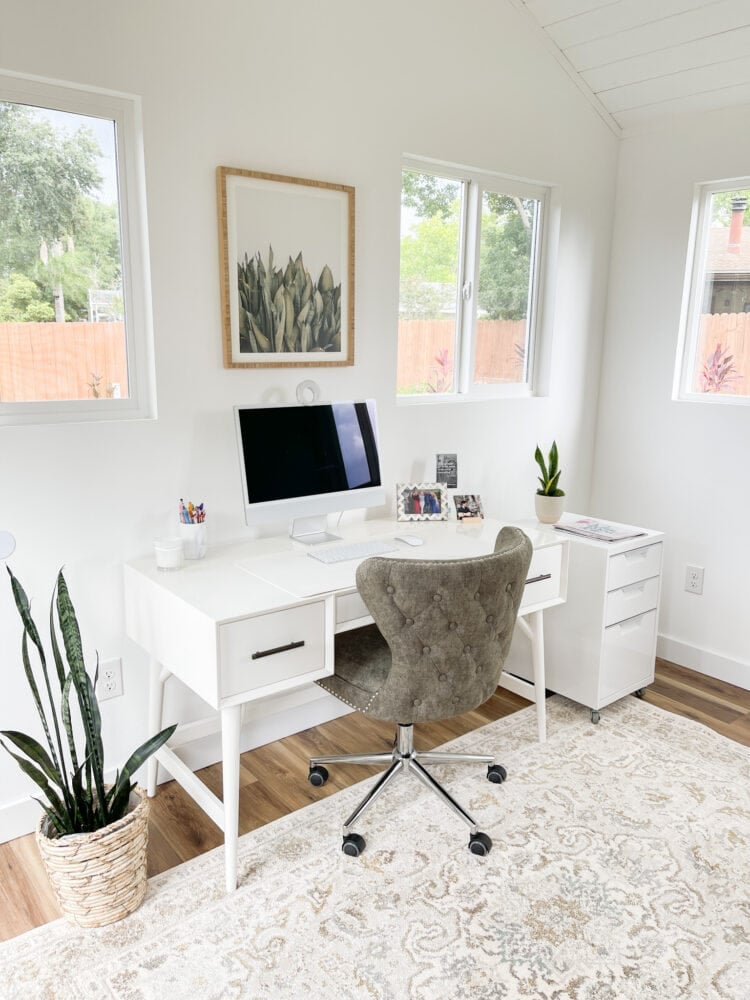
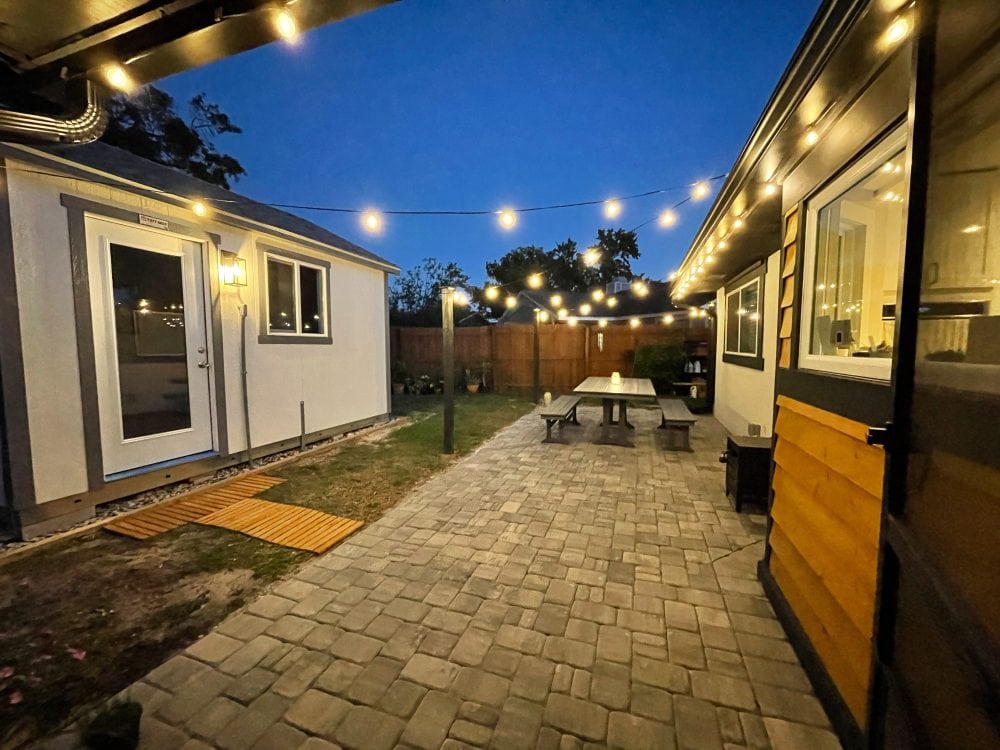
It’s now been about three months since the she shed office has been completed. I’ve had a chance to furnish the inside and wanted to add updated photos. We are currently have a deck built on the front with some landscaping so I’ll add more photos this fall.

Hi Rachelle,
I am also building a shed to work out of. I have two small kids that make a lot of noise and have a lot of customer meetings similarly to your husband. I was curious if there were any concerns with moisture getting between the wood paneling and the underside of the roof? Could you provide information on how you insulated the roof and also which can lighting you used. My electrician says there isn’t enough room for him to wire those style lights because there’s only 4 inches between the roof and future drywall/ shiplap ceiling. Thank you so much for you help.
Hi Brandon!
I’ve had no moisture issues at all. The roof was done to code for the state I’m in (Florida) and we get A LOT of water. The only extra things I did for water mitigation was caulk the nail holes outside where they attached the trim pieces (the nail holes were deep), added extra caulk around the pipe where the electric comes in, and added an extra coat of paint to the trim. The door frame also needed an extra coat of paint. As for the can lights, my electrician sized a couple of different can lights to find one that would fit. They are shallow and LED. This isn’t the exact one he used, but similar: https://amzn.to/3d3cJ46 We had no issue with adding the insulation. For A/C we added a mini-split and the shed has been nice and cool all summer. Hope that helps! Enjoy your shed!
Thank you so much this information. It is very helpful. I love your office by the way and can’t wait to get mine finished!
Hi there!
Im doing something similar here in a couple of months and wondering if you could give me details as to what you used for insulation and the type of wood planks you used for your interior roof? Your shed actually inspired me to do this instead of an add on to our home.
Thank you!
Hello! The team that installed the drywall and ceiling just used regular home insulation. Whatever was to code for the AC. The wood planks are tongue and groove so they fit together nicely.
Thank you so much for information. I am a court reporter and plan to relocate our office to my daughter’s new home. We are researching whether to add on or purchase a shed. Your article is most helpful and insightful.
Thank you, Amy! Have fun building your perfect office! For us, this was a lot easier than adding on to the house. And I love working in my she shed. Writing to you from it now. 🙂
This is such an informative breakdown of building a she shed office! As someone who runs SE Yard Solutions and specializes in custom shed building, I can definitely appreciate the attention to detail you’ve outlined here. I love how you addressed the importance of considering set-back requirements before starting the project—it’s something many overlook but can save a lot of headaches down the line. I’ve personally worked with clients who didn’t account for this and had to redesign midway through.
One thing I’d add is to think about insulation, especially if you’re in an area with extreme weather conditions. Not only does it keep the space comfortable, but it also helps with energy efficiency, especially when you’re running electronics or A/C units like a mini-split system. What kind of insulation did you use for the shed, and how has it held up?
It’s great that you mentioned getting multiple quotes for foundational work—that’s essential! At SE Yard Solutions, we also advise clients to ask for references and check previous work when hiring contractors.
Lastly, the point about using a mini-split for both cooling and reducing humidity is spot on, especially in humid climates like Florida. Would love to hear more about how you’re managing energy efficiency with it.