One of the questions I’m most often asked is, “how do you start a blog and then get paid to travel the world?” Seems like a dream job, doesn’t it? After 8 years in this business of blogging, circumnavigating the globe on an around-the-world trip, and visiting over 50 countries, I can tell you from experience that it is definitely attainable! And thing that has made it all possible is having a blog.
WORK FROM ANYWHERE
If your dream is to have the freedom to work from anywhere — whether that’s making money at home in your pajamas or opening up your laptop at a trendy coffee shop in Rome while you earn money online — it is entirely possible in this digital age. Whether you’re interested in travel, food, home decorating, or any other passion you want to turn into side hustle or full-time business, this page is a checklist of useful tools to start a blog.
TAKE YOUR TIME
Building a blog, or any business for that matter, is a lot like cooking. It takes a collection of ingredients, prep work, and time to make a delicious meal. But bit-by-bit, you’ll get there. Enjoy the journey! It doesn’t happen overnight, and if you want a little inspiration by seeing where I started, take a peek at my first blog, Innside Story.
“You never know what’s around the corner. It could be everything. Or it could be nothing. You keep putting one foot in front of the other, and then one day you look back and you’ve climbed a mountain.”
― Tom Hiddleston
Before digging into this list of resources below, an important disclosure: Some of the links below are affiliate links, which means that if you choose to make a purchase, I will earn a commission. This commission comes at no additional cost to you. I have personal experience with all of these companies, and I recommend them because I believe they are useful.
START A BLOG – TOOLS OF THE TRADE
PICK A DOMAIN: When I started my first blog, Innside Story, I made the mistake of buying my domain name through Google, and because they don’t have a real customer service department, I lost that domain when my credit card expired because there was no real customer service department to call for help. When it comes to buying domains, I recommend going with a registrar that has reliable customer service and a phone number you can call if you need help. GoDaddy is the the world’s largest registrar and they have a customer service line you can call 24/7.

BLOG DESIGN TEMPLATES: StudioPress is another good option for self-hosting and they also have a great collection of gorgeously designed mobile responsive WordPress themes. When you are just getting started, picking out a template will allow you to create a professional looking website in no time at all.
MALWARE SECURITY: As your website grows and you invest time in creating great content, you’ll want to make sure it is protected from malware. I had the unfortunate case of being attacked with malware early on, and I can tell you from experience that cleaning it up is not fun. Sucuri is the most affordable option (around $9 a month) for providing a firewall to your website.
BLOGGING COURSES & ONLINE LEARNING
ONLINE BUSINESS COURSES: Food Blogger Pro is a comprehensive (and very affordable!) group of online video courses that teach everything from SEO to food photography and video editing. Even if you’re not a food blogger, I still think the lessons here are valuable and can be used in other niches too. They only open enrollment a few times a year, so be sure to sign up to be notified. What I love most about it is that you can go at your own pace and apply what you learn. Join the Food Blogger Pro Waiting List!

GRAPHIC IMAGES AND CAMERA GEAR
You don’t need the most expensive gear to get a great shot, but you will want to produce professional looking photos for your blog. If you’re just getting started, there’s a great site called Canva that has an extensive collection of stock photography and design templates that are perfect for creating images for your blog. Some of the images are free, and some are only a dollar to license. As you go pro, I highly recommend taking photography courses from Creative Live and investing in your own photography equipment to curate original images. Whether you’re taking pictures of food, travel, or crafts at home, here is a great equipment list to get you going.
CAMERA BODY: You could go with a DSLR, but I find that mirrorless cameras are lighter, more compact, and have an increasing variety of lenses available too. My favorite is the Olympus OM-D E-M10 (Read: Olympus Review), but Sony and Lumix also make great mirrorless/micro-four-thirds cameras too. I recommend getting one that fits your budget and style best.
CAMERA LENS – FOOD: For food photography or those fun overhead Instagram shots, you want a 50mm or equivalent. For my Olympus, I love shooting food photography with a 25mm f1.8 lens. It does really well in low light situations and gives a nice bokeh effect too. It’s also compact and easy to travel with.

When I travel, I like to bring my Sirui Carbon Fiber tri-pod since it is lightweight and compact. But for something a bit more stable and better suited to shooting video, I recommend a Manfrotto tri-pod.
If you plan on doing a lot of overhead style shots, you’ll also want to get a boom arm for your tri-pod as well as a camera counterweight for the end of the boom arm to balance your camera. Although, in a pinch I’ve used a bag of rice as a counterweight before. 😉
CAMERA LIGHTS: When it comes to lighting, the Lowel EGO lights are best for home use. They’re compact, lightweight, and easy to store. I have two of these that I use to light up food photography. I prefer natural window light, but these do a great job filling in shadows, or providing daylight conditions when shooting in the evening. These fit nicely on a tabletop and also has a threaded hole in the base that you can use with a quick release plate on a tri-pod.
PODCASTING EQUIPMENT
RECORDING EQUIPMENT: We ran our podcast for almost two years and recorded 80 episodes! Currently we’re in the process of transcribing all of those great interviews! I’m often asked what equipment we used for recording. It’s the Zoom H4N PRO Digital Recorder. This works great with or without an extra microphone input and is small enough to be perfect for travel.
MICROPHONES & EXTRAS: 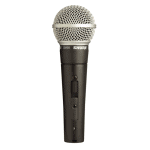
SOCIAL MEDIA MANAGEMENT
- PINTEREST: For Pinterest, the best scheduling and analytics program I’ve found is Tailwind. With this online tool, you’re able to easily schedule pins, see what time slots get the best engagement, and track analytics for your pins.
- TWITTER: For Twitter, I pretty much tweet live from my phone. But if you’re participating in a chat or want to view more than on conversatoin at a time, I recommend Hootsuite. For tracking the reach and analytics for hashtags, check out Hashtracking.com. And for curating and storing a grouping of tweets (and Instagram posts) for a specific campaign or story line, check out Storify.com.
- FACEBOOK: I’ve found that scheduling directly in Facebook is best for engagement. For free images and graphics, we like to use Canva. And for easy-to-produce square-style videos, I highly recommend Animoto.
THE BUSINESS OF BLOGGING
- ACCOUNTING: Whether you’re building your blog to be a business or just a side hustle, keeping your accounting records organized is important. Use a separate credit card and checking account for all your blog expenses to keep track of things easily. Working with an accountant will save you time and give you peace of mind. I work with Mazuma, an online accounting company that specializes in blogs and small businesses. FreshBooks is another online accounting resource that’s great for sending and tracking invoices and tagging expenses with categories so you’re organized for tax time.
- EVERNOTE: Evernote is a phone app I use to keep copies of documents I need while I’m traveling, but it is helpful for any small business owner. For example, I store travel itineraries, a list of blog post ideas, and business cards of people I meet. You can organize documents in folders and search by keyword.
- TINYSCANNER: Tiny Scanner is another great phone app to use when working on location from anywhere in the world. With it, you can take a picture of any document, turn it into a PDF, digitally sign and then deliver it via email. I also use Tiny Scanner to keep track of my business receipts while traveling. It’s available for most operating systems, including TinyScanner iPhone and TinyScanner Google Play.


Leave a Reply