
This Earl Grey creme brûlée recipe is inspired by a trip to Great Britain where we indulged in dessert a few times too many, and one of those happened to be an Earl Grey creme brûlée. There’s nothing quite as satisfying as the crack of a spoon breaking through the caramelized sugar crust of a crème brûlée, revealing a silky custard beneath. Except, when that custard has the bold flavor of tea instead of traditional vanilla. My mind was blown and I knew I had to try and make this at home!
Turns out, making Earl Grey Creme Brûlée is a lot easier than I thought it would be. The secret is in infusing the cream with Earl Grey tea before you begin. I also have time-saving tip below for infusing the cream with tea flavor. The only hard part about this recipe is resisting the temptation to drink the infusion as the scent of creamy bergamot and black tea is quite tempting.
Ready to try it? Simply hit the “jump to recipe” button to get started. Or scroll through below for step-by-step recipe photos and a little trivia about Early Grey. Enjoy!
Earl Grey: History or Good Marketing?
You might wonder why it’s called Earl Grey tea. It’s named after Charles Grey, the 2nd Earl Grey who served as British Prime Minister in the 1830s. But here’s the fun part: nobody really knows the true story of how this tea came to be!
The Grey family tells one story: that the tea was created for them to counteract the lime-heavy water at their estate, Howick Hall. Lady Grey loved it so much she served it at her London political gatherings, and eventually Twinings got permission to sell it.
Meanwhile, Jacksons of Piccadilly insists they’re the original creators, claiming Lord Grey personally handed them the recipe. And some tea historians have found references to “Grey’s Tea” being sold by a merchant named William Grey long before it became fashionable.
The “Earl” title might have been added simply to make it sound fancier and more posh (marketing tactics are nothing new!). But regardless of which story is true, what matters is the distinctive bergamot orange that gives this tea its unique flavor profile.
The Flavor Of Earl Grey
What really makes Earl Grey special is the addition of oil from the bergamot orange, a citrus fruit grown primarily in Italy. This bergamot infusion creates those distinctive floral, citrusy notes that complement the robust black tea base. It’s sophisticated without being snobby, bold yet subtle. I think these qualities make it perfect for incorporating into desserts.
And the delicate flavor of Earl Grey tea pairs beautifully with the rich, creamy base of a traditional crème brûlée. The bergamot’s citrus notes cut through the heaviness of the cream, while the tea’s floral undertones add complexity that vanilla alone just cannot achieve.
The Secret to Perfect Earl Grey Infusion
Now for my secret tip. The key to this recipe is properly infusing the heavy cream with Earl Grey flavor. By heating the cream and steeping the tea bags directly in it, you extract maximum flavor. The fat in the cream beautifully captures the essential oils from the bergamot, creating a more rounded flavor than you would get from simply adding brewed tea.
How To Make Earl Grey Crème Brûlée Step-By-Step
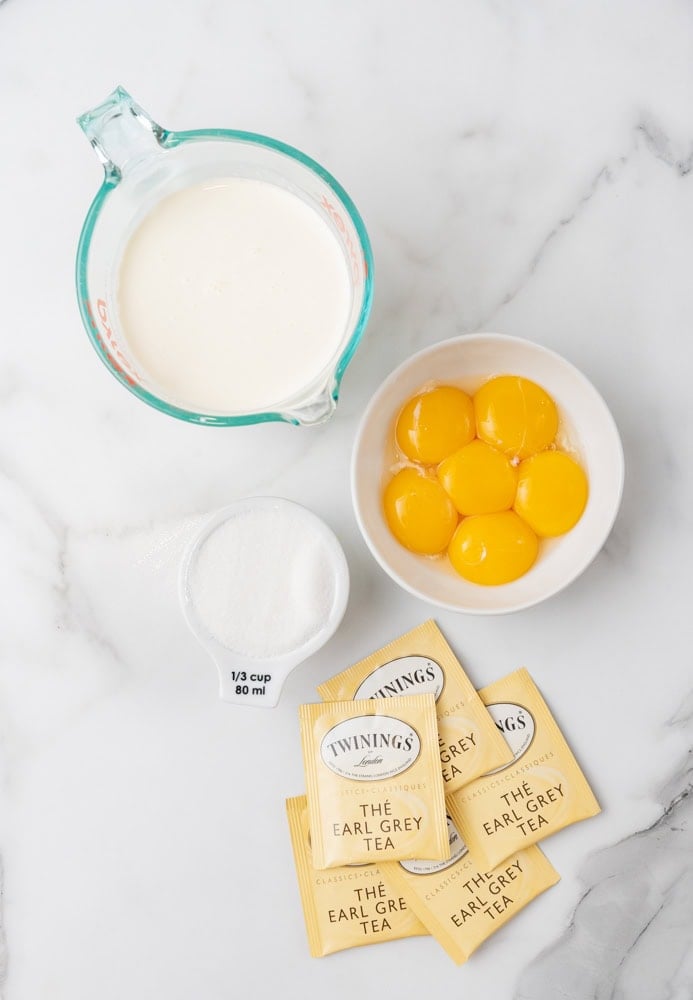
First, gather together your ingredients. Here’s a list of what you’ll need:
- egg yolks
- heavy whipping cream
- Earl Grey tea
- sugar
Infuse the cream (Stovetop Method)
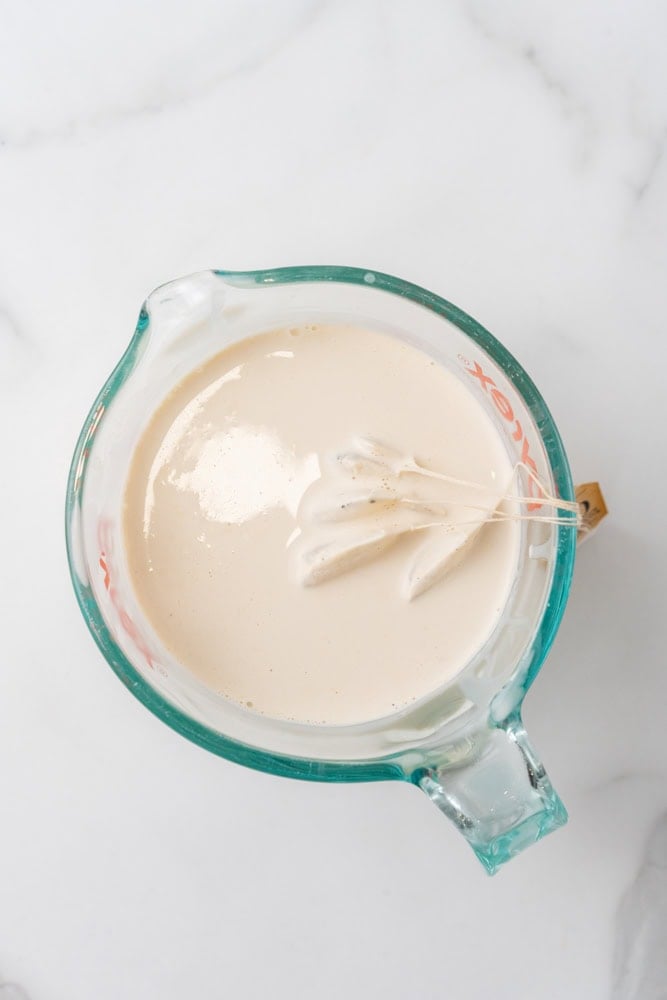
In a medium saucepan, heat the heavy cream until it just begins to simmer (do not boil). Remove from heat, add the Earl Grey tea bags, cover, and let steep for 15-20 minutes. The cream will take on a slight tan color and the wonderful aroma of the tea. My kitchen always smells amazing during this step!
Time-Saving Microwave Method
Want to save some time? Instead of the stovetop method above, pour the heavy whipping cream in a microwave-safe bowl (preferably one with a handle like a large measuring cup for easy pouring later). Heat in the microwave for one minute, stir, heat for another minute, stir again, then heat for a final minute and stir once more. This total of three minutes with stirring in between ensures even heating without boiling. Add the 5 tea bags, dunking them a few times so they absorb enough cream to stay submerged. Cover with plastic wrap and let steep on the counter for 30 minutes. This is actually my go-to method most times I make this.
Prepare your oven: Preheat to 325°F (165°C). TIP: Set up a water bath by placing a small kitchen towel in the bottom of a large baking dish. The towel prevents the ramekins from sliding around and helps them bake more evenly. I don’t always do this, but it sure helps when I do!
Mix The Earl Grey Custard Base
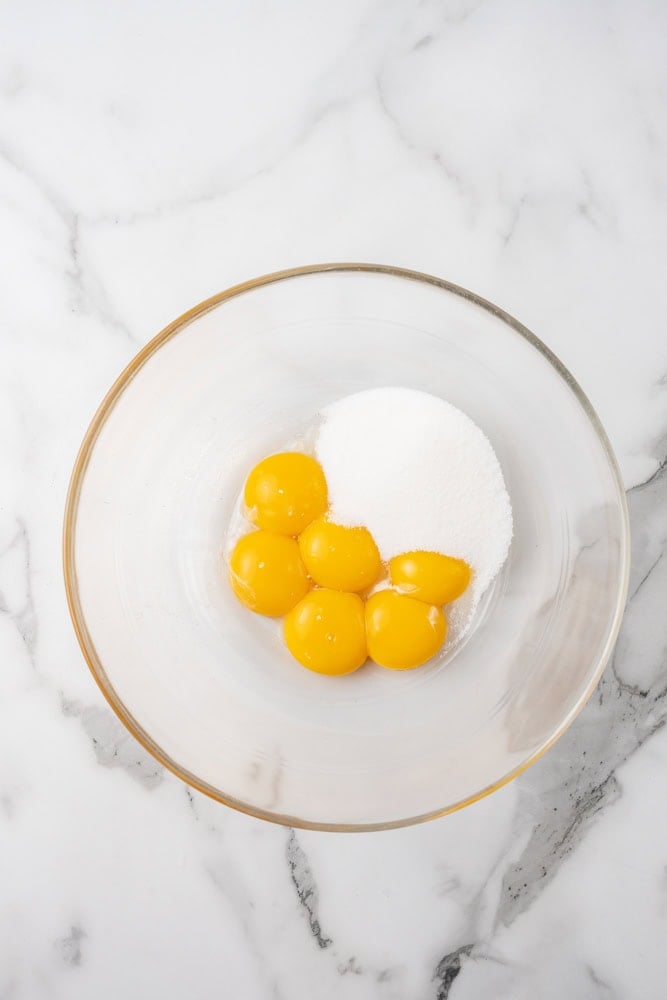
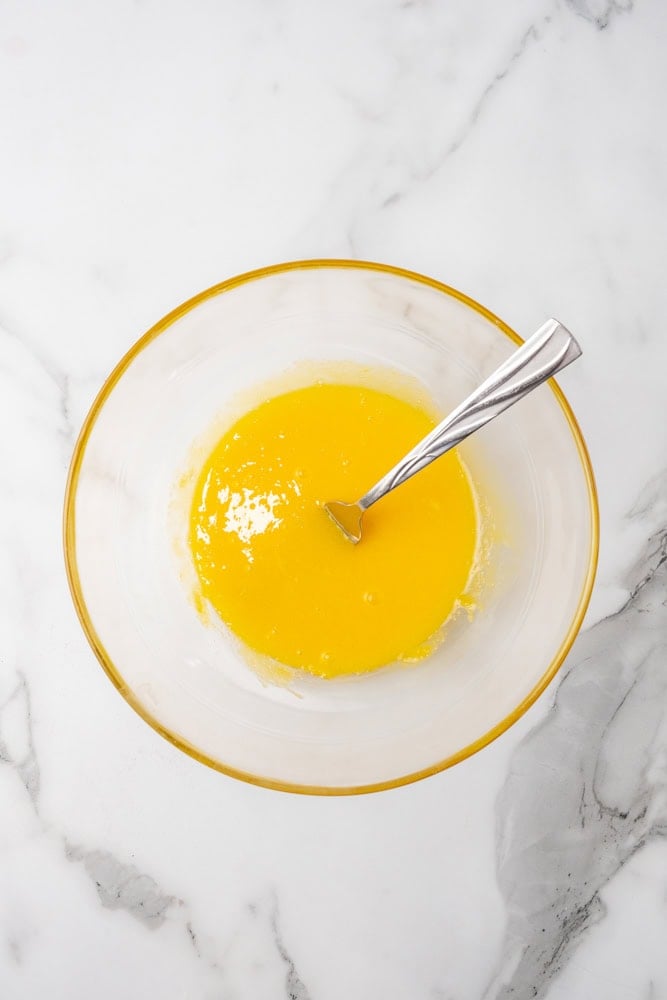
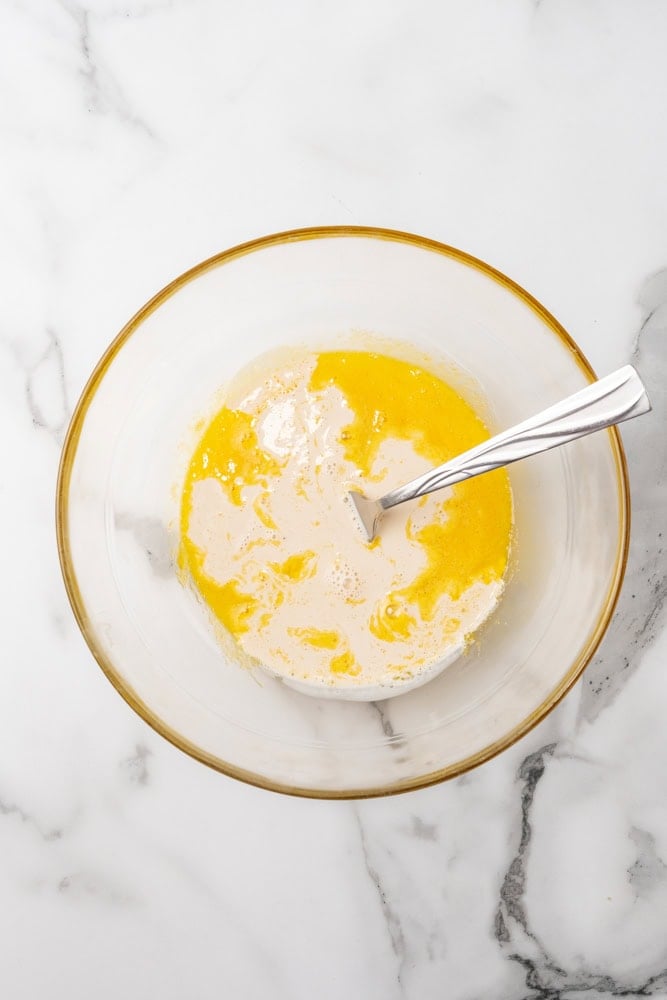
In a bowl, whisk the egg yolks and 1/3 cup sugar until the mixture lightens in color. Remove the tea bags from the cream, gently squeezing them to extract maximum flavor. Slowly pour the warm infused cream into the egg mixture, whisking constantly to prevent curdling. This step requires patience but it’s worth it!
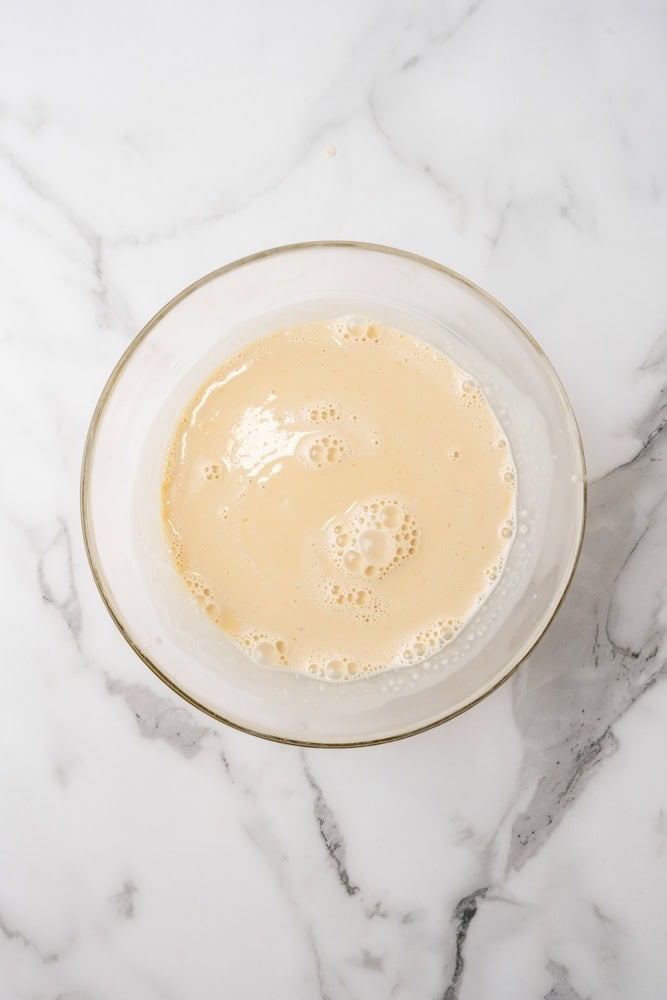
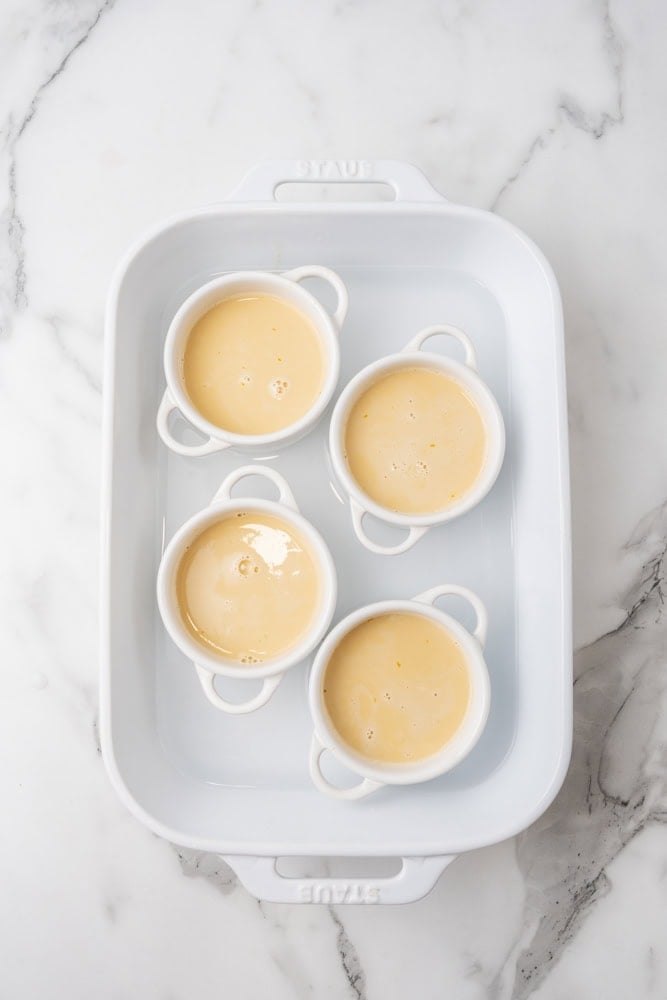
Pour the mixture through a fine-mesh sieve into ramekins or tea cups. Place them in your baking dish and add enough hot water to reach halfway up the sides.
Bake The Earl Grey Creme Brûlée
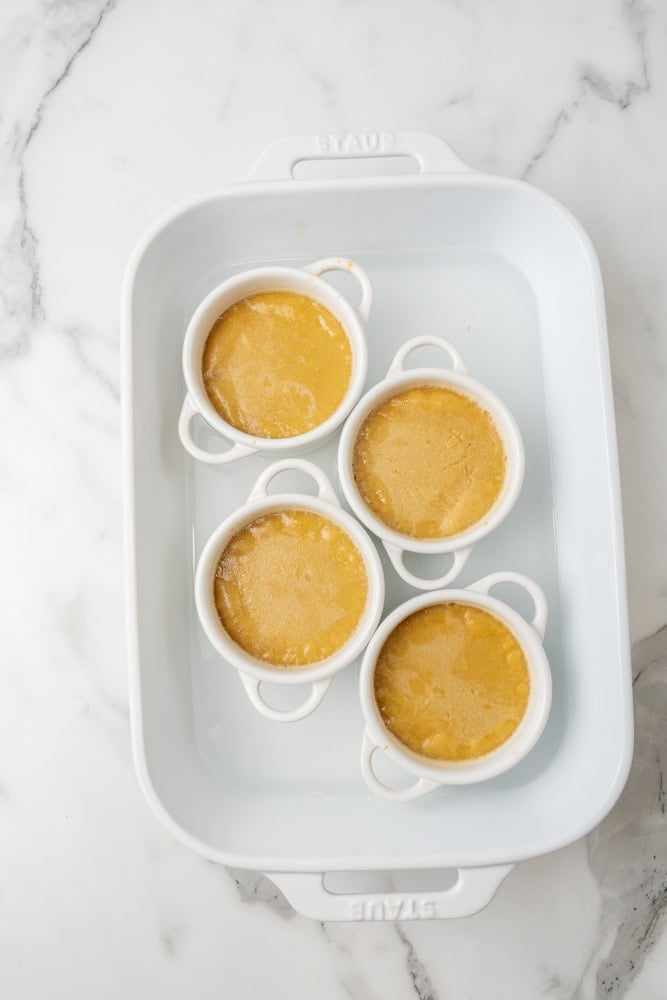
Bake for 30-35 minutes, or until the centers are barely set and still slightly jiggly. Remove the cups from the water bath and cool completely, then refrigerate for at least 2 hours or overnight. I often make these the day before a brunch or dinner party.
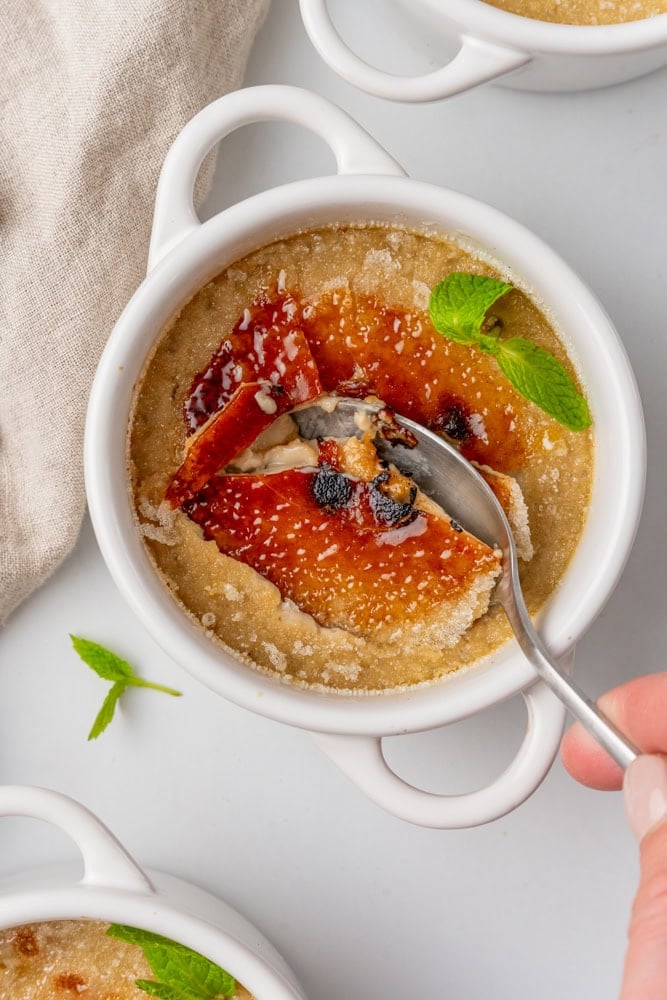
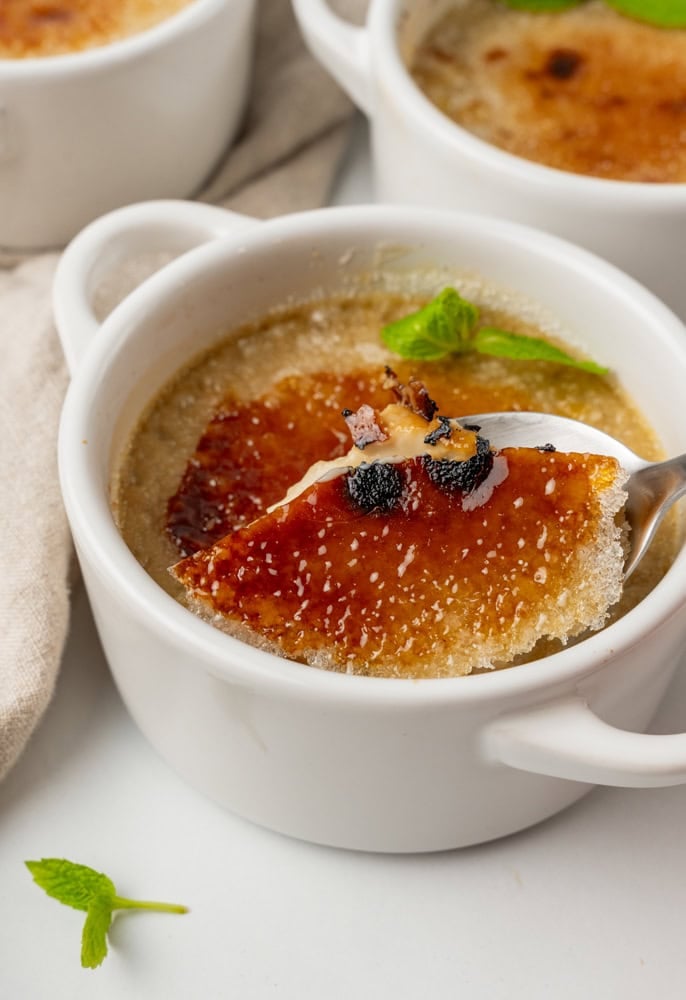
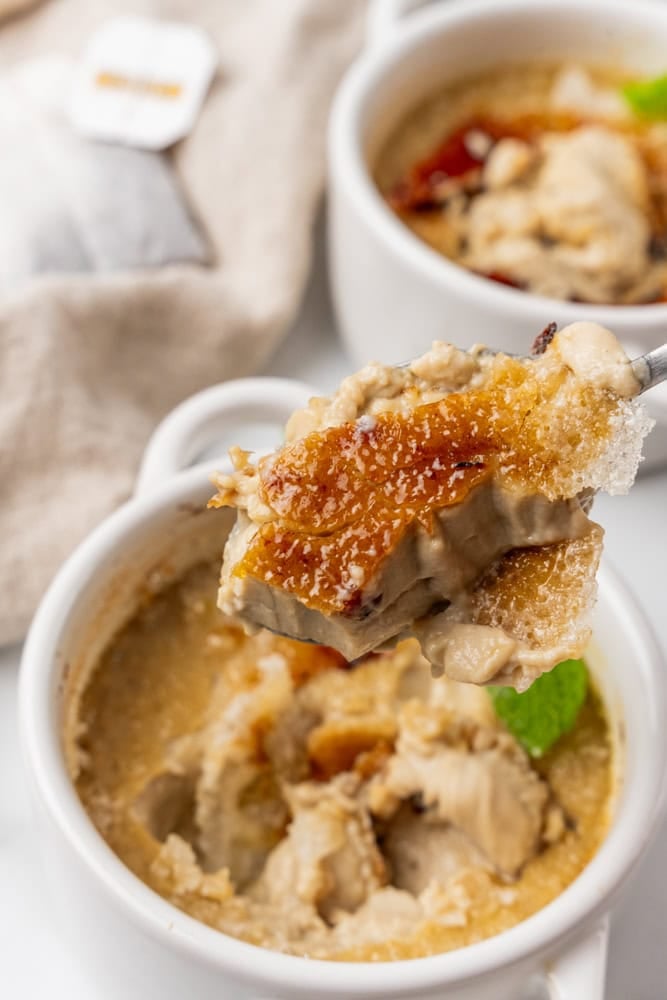
Caramelize The Sugar
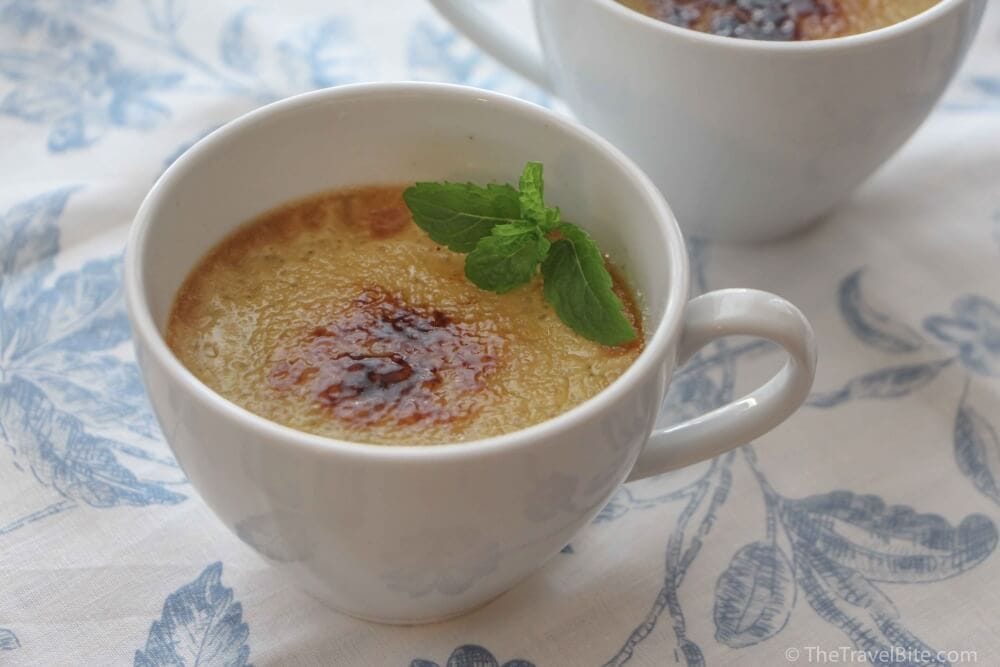
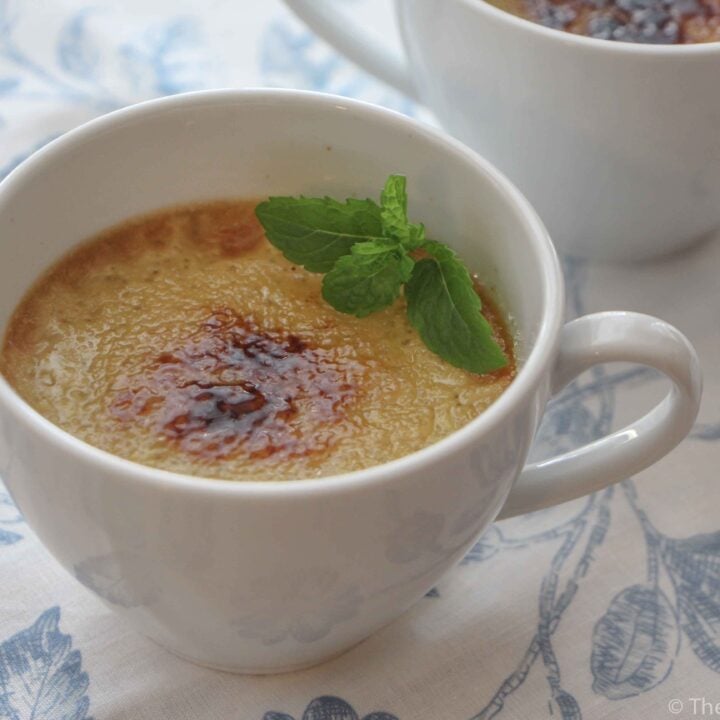
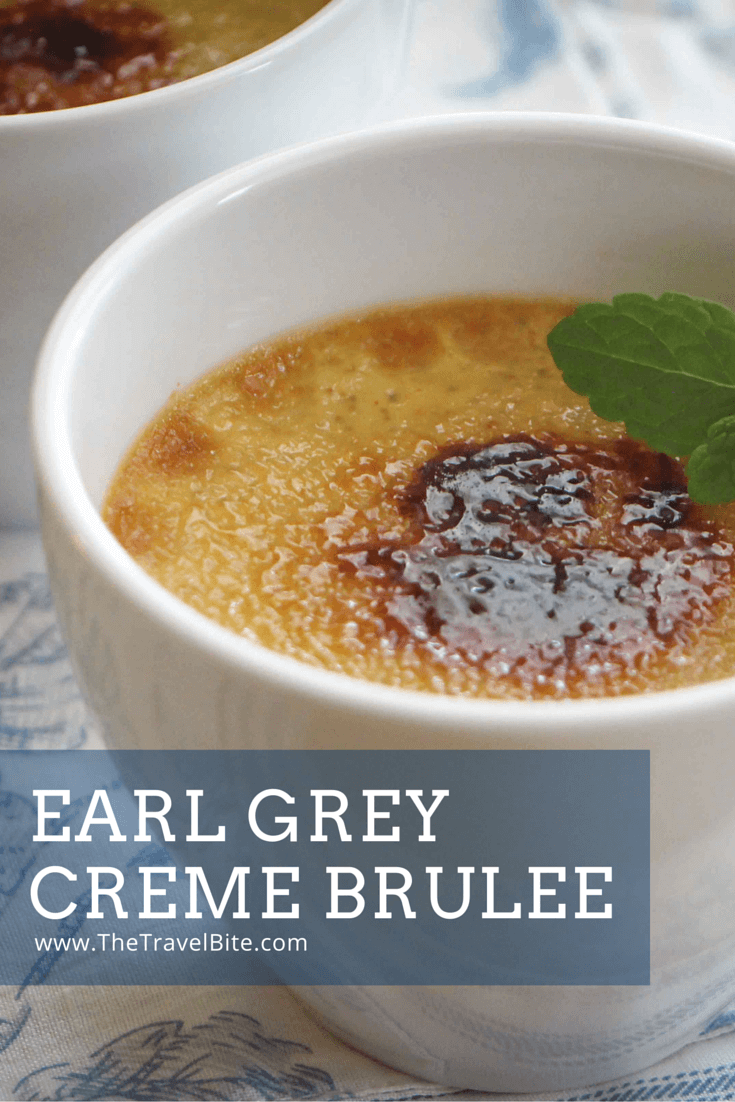
Just before serving, sprinkle each custard with about 1 teaspoon of sugar in an even layer. (I like to tap the handle of a spoon full of sugar so it sprinkles more evenly) Using a kitchen torch, melt the sugar until it caramelizes to a deep amber color. Allow the sugar to harden for a minute before serving.

A Note on Presentation
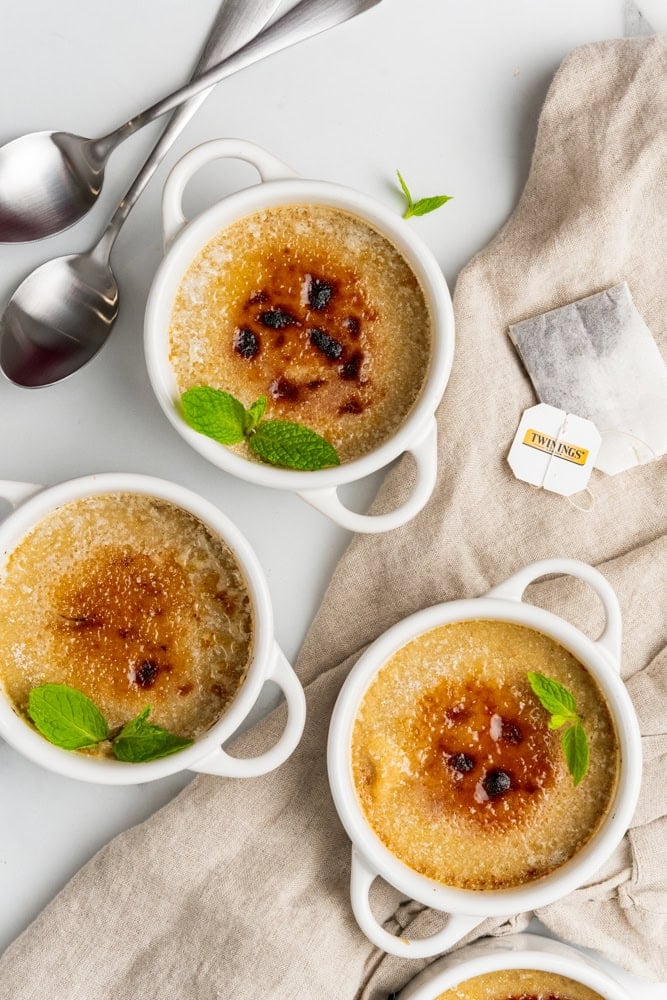
You know what’s fun about this dessert? While it’s gorgeous just as is, I love jazzing it up with a few personal touches. Here’s my favorite serving trick: skip the boring ramekins and use actual tea cups instead! How perfect is that for a tea-flavored dessert, right? It’s such a cute nod to the Earl Grey and makes the whole presentation feel intentional.
(The one I have pictured below from my original post in 2015 are the VÄRDERA tea cups from Ikea.)
This Earl Grey Crème Brûlée takes a beloved classic and completely transforms it into a delicious surprise. And the bergamot-infused cream creates such an aromatic and flavorful experience too. It’s perfect for a dinner party finale or even a personal indulgence on a quiet Sunday afternoon while reading your favorite book.
Earl Grey Creme Brûlée
Ingredients
- 6 egg yolks
- 1 pint heavy whipping cream
- 5 Earl Grey tea bags
- 1/3 cup sugar
- 4 tsp sugar for brûlée
Instructions
- Pour 2 cups (1 pint) of heavy whipping cream in a microwave safe bowl, preferably one with a handle such as a measuring bowl to make it easy to remove.
- Heat in the microwave for one minute, stir, heat in the microwave for another minute, stir, and heat for one last minute and stir again. It's a total of three minutes in the microwave, stirring in-between each minute to make sure it evenly heats and doesn't boil.
- Add 5 tea bags to heated cream, making sure to dunk them a few times so that the bags absorb enough cream to stay submerged and begin to infuse it with flavor. Cover with plastic wrap and let it steep on the counter for 30 minutes.
- When the tea is just about done steeping, heat your oven to 325.
- Separate your egg yolks from the whites (if you haven't already done so) and add them to a small mixing bowl. Pour 1/3 cup sugar over the egg yolks and gently stir with a fork or spoon, folding the sugar into the yolks. Don't use a whisk as that will cause it to bubble.
- When the tea-infused cream is ready, slowly pour into the egg mixture while gently stirring with a spoon. Once the cream and egg mixture are blended together, pour mixture into 4 ramekins or small tea cups.
- Place the ramekins in a deep baking pan or casserole dish and put them on the middle rack in the oven. Pour hot water (tap water is okay) into the baking pan until the water looks like it is just about even with the cream on the inside of the ramekins.
- Bake for 45 to 50 minutes at 325 degrees.
- Carefully remove the baking pan from the oven and allow to cool. Then cover the ramekins with plastic wrap and refrigerate up to 2 hours or overnight.
- When ready to serve, sprinkle each ramekin with a teaspoon of sugar and carefully melt the sugar using a kitchen blow torch (Please take care and follow package instructions for using the torch.)
- Garnish with a sprig of mint and serve.
Nutrition Information:
Yield: 4 Serving Size: 1Amount Per Serving: Calories: 570Total Fat: 50gSaturated Fat: 30gTrans Fat: 1gUnsaturated Fat: 17gCholesterol: 412mgSodium: 45mgCarbohydrates: 26gFiber: 0gSugar: 24gProtein: 7g
Nutritional information provided is only an estimate.
Want to save this recipe for later? Pin it!
Originally posted in 2014. Updated in 2025.
This looks SO good, just stumbled across your blog after a little google-evening. So glad I have! Brilliant dessert ideas, I need to try the coconut flan too!