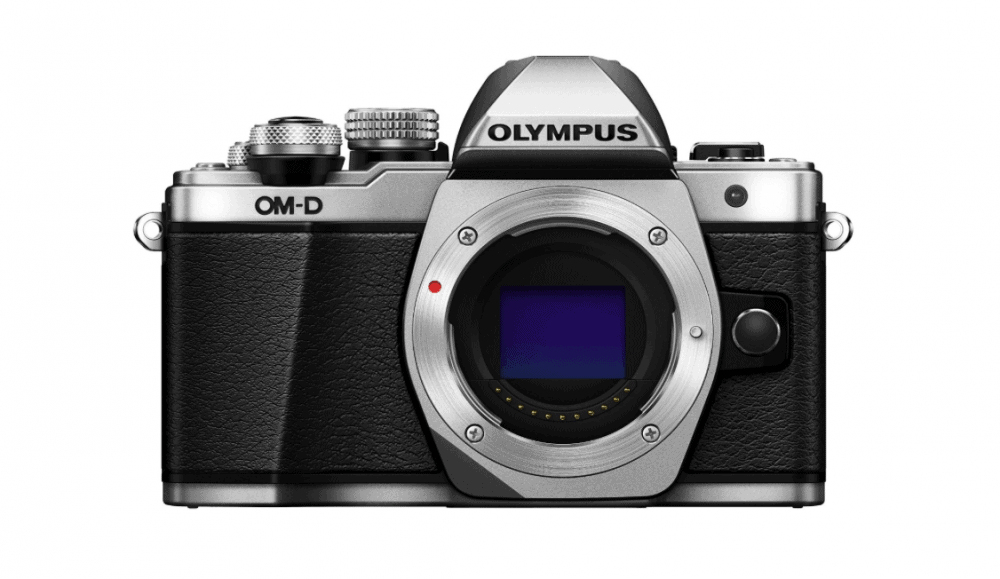
Previously, I posted about our research to find the best mirrorless camera for travel, and ultimately ended up purchasing the Olympus OM-D E-M10.
I chose the Olympus OM-D mirrorless camera because of the variety of options for interchangeable lenses, and unique scene modes for travel photography.
Now that I’ve had a chance to use it for a couple of months and test it out on several trips, I feel like I have a much better perspective (and some example photos too!) to do a full review on the Olympus OM-D E-M10 Mark II.
I’ll go over my favorite features below, as well as recommended lenses and some tips specifically for the Olympus OMD- E-M10 Mark II.
MY FAVORITE OLYMPUS OM-D FEATURES
— Best-in-class 5-axis Image Stabilization – I take a lot of photos handheld because it is not very convenient to traipse around with a tri-pod while traveling. The 5-axis image stabilization feature makes sure your photos come out sharp, even when shooting handheld. Take a look at these from Alaska:

Photo of glacier in Alaska. Zoom at 45mm on 14mm-150mm lens.

Photo of glacier in Alaska. 150 mm on 14mm-150mm lens.
— Touch Screen LCD Focus – This is my absolute favorite feature. There are 81 focus points on the Olympus OM-D and it is as simple as touching LCD screen to choose what you want the camera to focus on. It is so intuitive to use and makes focusing on subject matter so easy.
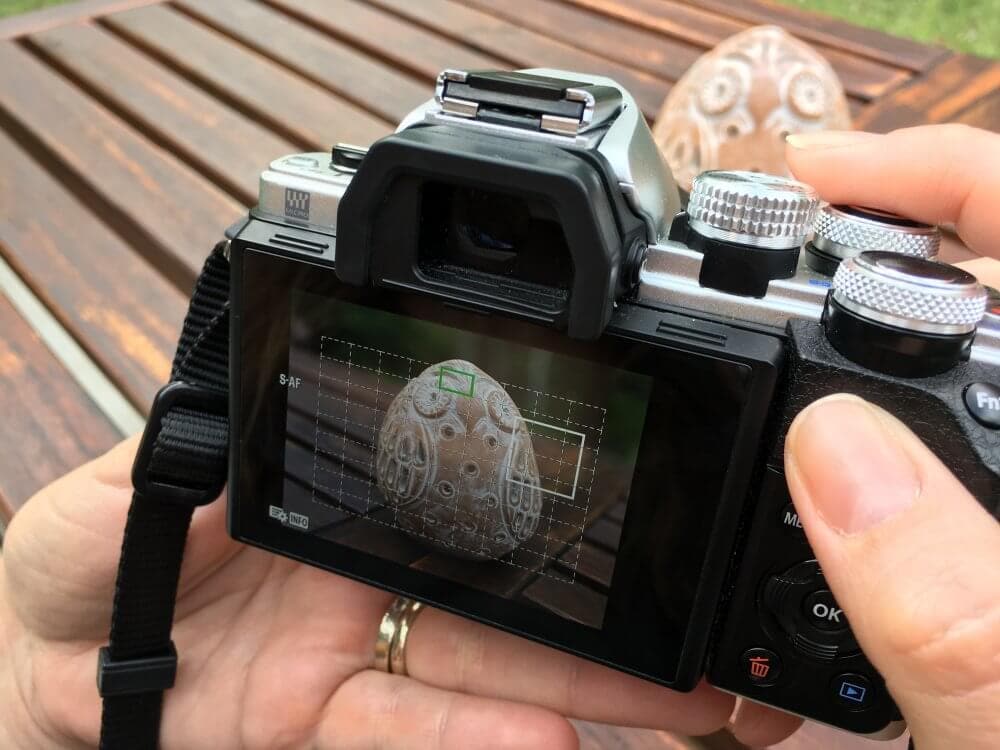
Taked on iPhone to show example of using Touch Screen Focus on Olympus.
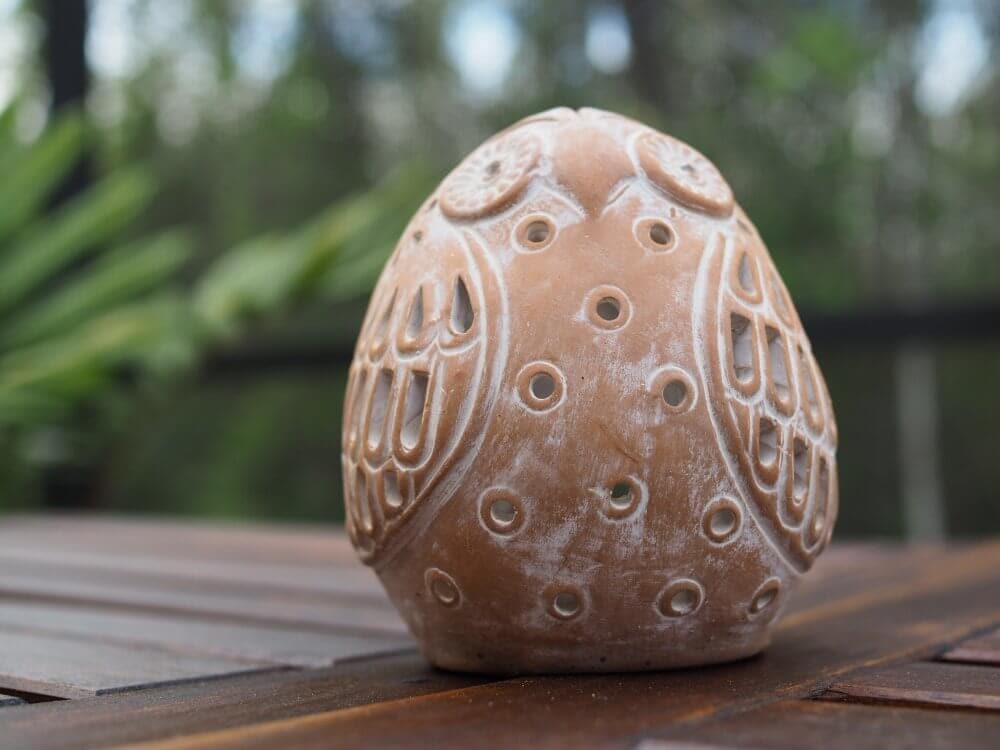
Photo taken in example shown above. Aperture Priority, ISO 200, f/2.8, 25mm lens.
— Silent Shutter Mode – This menu feature is perfect for when you’re visiting a quiet place (like a cathedral, or museum) and don’t want the sound of a shutter to disturb the peace and quiet of the situation your in.

Unedited photo of Pete in Victoria, B.C. using Night Portrait Mode and Olympus 22mm lens.
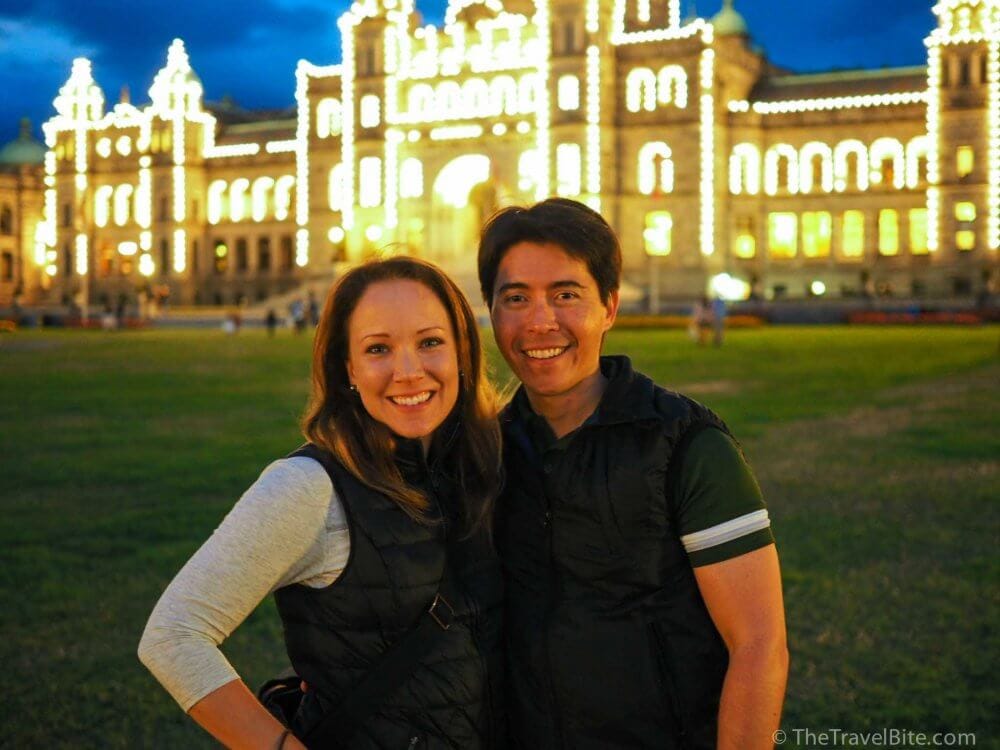
Unedited photo of Rachelle and Pete in Victoria, B.C. using Night Portrait Mode and Olympus 25mm lens.
— Scene Select – Olympus touts the OM-D series as a camera you can grow with, and I have to agree. If you’re just getting started with photography, the auto features on this camera are amazing, including pre-sets built in for situations like sports, night portraits, macro, hand-held starlight, fireworks, and sunsets. The Scene Select modes are so convenient for getting a quick setting adjustment while on-the-go too.
— Aspect Ratios – The aspect ratios are easy to change in the menu, from 16:9, 4:3, 3:4, 3:2, and 1:1. I use the 1:1 ratio to instantly capture square photos optimized for Instagram without having to crop or edit them.
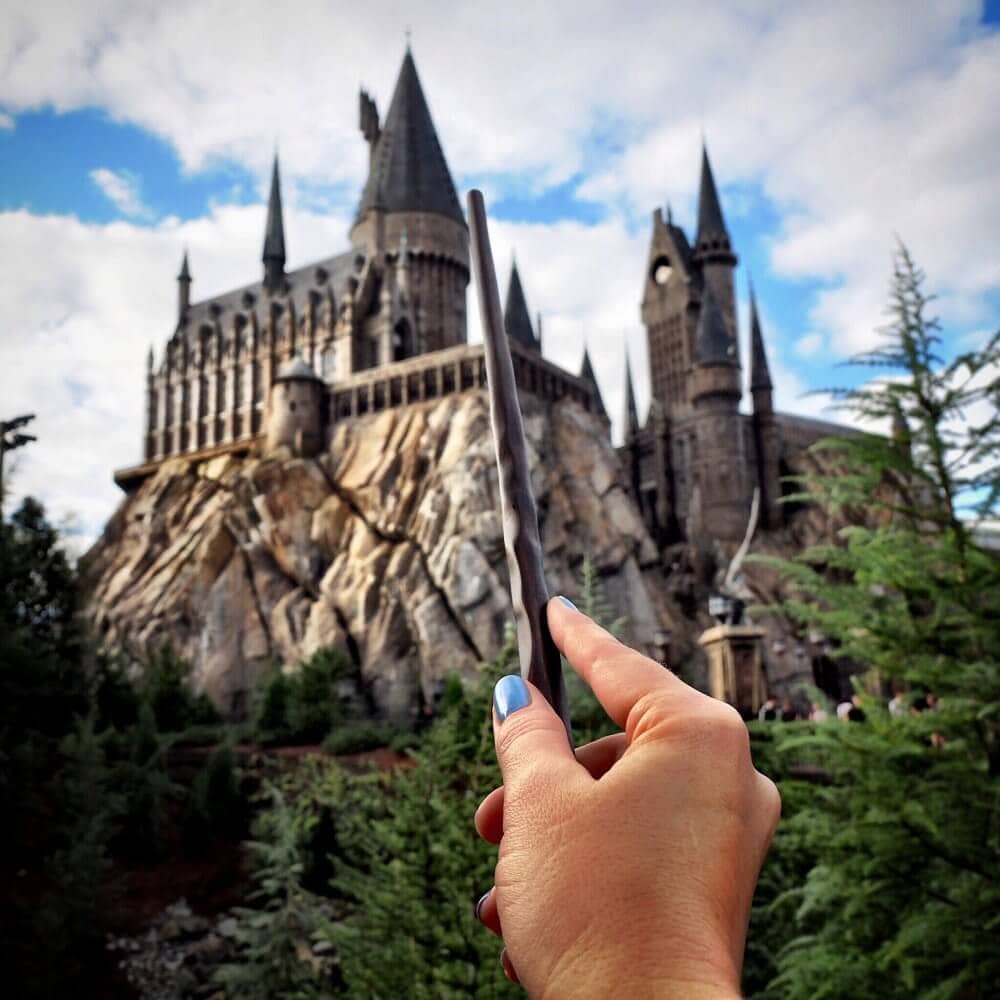
Photo from trip to Universal Orlando using 1:1 aspect ratio and 24mm lens.
EASY SOCIAL SHARING!
It was only three years ago when I was dependent on an Eye-Fi card to transfer my photos to my phone in order to share them on social media. The Olympus OM-D E-M10 Mark II has built-in wifi, and the corresponding OI.Share app is easy to use. The best part is you can select which photos you want to download to your camera, rather than having to download all the photos off your card (as is the case with other cameras and Eye-Fi cards).
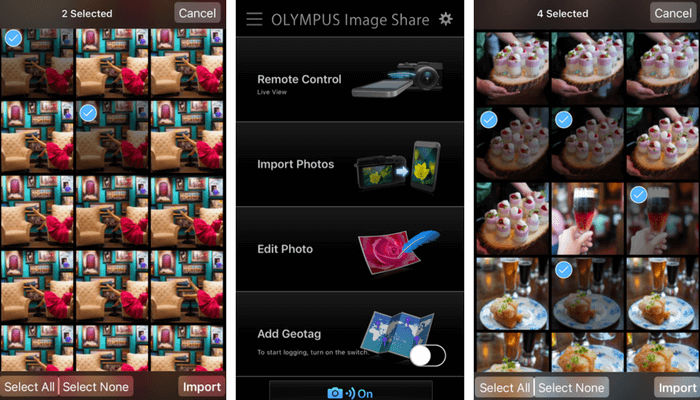
Olympus Photo Share App – Downloading Select Photos To Phone
Not only does this help you save so much storage space on your phone, it also saves time as it is quicker to download just a handful of the photos you want to share. Another bonus? You can use your phone as a remote for the camera! This is so convenient if you’re trying to take a group photo on a tripod, or want to avoid camera shake for a night shot.

Unedited photo of desserts at Raglan Road in Orlando using Aperture Priority, ISO 200, f/1.8, 25mm lens.
LETS TALK LENSES
There are so many micro four thirds lenses on the market, from Olympus as well as other companies too. As long as it is micro four thirds, it is compatible with the Olympus OM-D E-M10 Mark II. Whether you want a basic zoom lens for travel, or a wide angle or macro lens, there’s at least 30 or more to choose from. I have my favorite lenses outlined in more detail below. If you can’t decide what you want, or don’t have the budget to get all the lenses you’re interested in, than I highly recommend renting lenses from BorrowLenses.com
— Olympus 14-150mm f/4.0-5.6 II Lens – This is the lens I use most often for travel because of it’s versatility. If you’re going on a tour or have a fast-paced schedule and don’t want to have to change lenses on-the-go, the 14-150mm lens is convenient because of it’s range. The only thing this lens is lacking is a faster (more open) aperture as it is limited at a 4.0 f stop. But through use I found it still does really well in low light situations.
— Olympus 25mm f1.8 – This lens is my favorite for food photography. It is the equivalent to a 50mm on a regular DSLR, and has a wide aperture range of f/1.8-22. That f/1.8 is great for low-light situations and for creating more depth-of-field (blurring out the background) for food and portrait photography.
— Olympus M.Zuiko 17mm f1.8 – If you plan on doing night photography, I’d add this 17mm lens to your kit. It’s a wide angle that’s also perfect for landscape photography and indoor shots where you’re trying to capture a whole room. It has a pretty wide aperture range, but the f1.8 makes it great for low light situations. When I was prepping to shoot the Northern Lights in Manitoba, this is the lens that was recommended.
— Olympus M.ZUIKO DIGITAL ED 12-40mm f2.8 PRO – This lens is a bit of an upgrade from the Olympus 14-150mm mentioned above. The 12-40mm PRO is super durable as the construction is dustproof, splash proof, and freeze proof.
SKIP THE MANUAL – TAKE COURSE ONLINE INSTEAD
I hate reading manuals. HATE IT! I’m much more of a visual learner, especially when shown the real-life application of things. If you haven’t checked them out before, Creative Live offers classes on just about every camera out there, so you never have to read a manual again. (YAAAAAY!). Right after I bought my Olympus, I spent a weekend afternoon taking the Creative Live class on the Olympus OM-D.
If you’re interested, they also offer basic photography classes, one on unique outdoor photography techniques, and a travel photography tool kit where you can learn more about composition. Even if you’re already a pretty decent photographer, I feel like there’s always something new to learn.
SOME OF THE CONS, BECAUSE NOTHING IS PERFECT
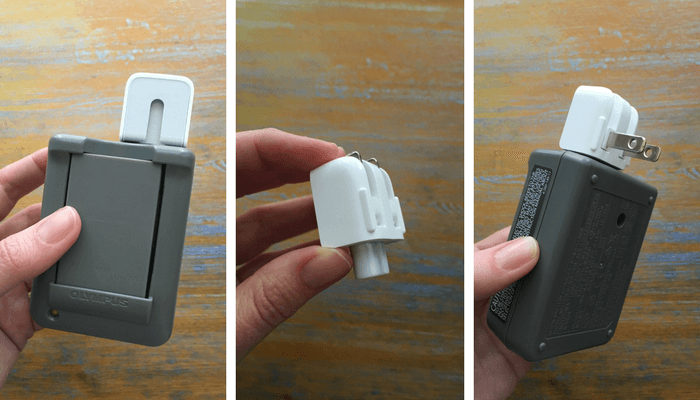
Using a duck head Mac plug instead of the long cord to save room for packing.
- Battery Charger Is Bulky – The Olympus OM-D is a great travel camera due to its compact size, but the charging cord that comes with the battery pack is a ridiculous length. It takes up about the same packing room as the camera! I found a great work-around for this, though, as the Apple/Mac Wall Plug Duck Head also fits the battery charger, so you can leave the long cord at home.
- Color Fidelity – The color output on the Olympus is a little more saturated than real life when compared side-by-side taking photos of the same subject with my Canon DSLR. That’s not necessarily a bad thing for basic travel/vacation photos. But I have to tone it down for some food photos.
- Tilt Screen LCD – The E-M10 just has a tilt screen LCD (up or down) for help seeing the shot when taking photos from overhead or below eye-level, verses the more maneuverable rotating screen on the Pro model Olympus OM-D E-M5.
- Performs Slow In Cold Weather – When we traveled to Germany in November for a Christmas Markets Cruise, the temperatures dipped to below 32 degrees Fahrenheit and I noticed the shutter would delay a bit, and the time it took to save an image to the card also slowed down. The images still came out sharp, it just wasn’t very quick. If you’re going to be traveling in colder climates, I would upgrade to the Olympus OM-D E-M5 Mark II
ACCESSORIES TO CONSIDER
- Apple Mac Ac Power Adapter Us Wall Plug Duck Head – I mentioned this one above when packing … If you already have a Apple Macbook or Desktop, you likely already have a stash of these duck head adapters. If not, they’re pretty inexpensive to purchase on Amazon and are worth the space you’ll save packing.
- Tempered Glass Screen Protector – I wish I had bought this when I first got my Olympus OM-D. I have some micro scratches in my screen from normal use, just from it brushing up against my shirt when wearing the camera around my neck while walking through a city. Do yourself a favor, if you’re buying a new camera, protect it with one of these screen protectors.
- Barrel Style Lens Case – To be perfectly honest, when I first got my camera I actually stashed it in a waterproof make-up bag inside my purse. LOL! Micro Four Thirds interchangeable lenses were still pretty new, and only the Pro Lenses came with a pouch. Thankfully, the market has caught up with demand and now there are protective travel pouches for micro four thirds lenses.
- Carbon Fiber Tripod – Above I mentioned that I don’t use a tripod that often when traveling, but when I do, I bring one that is super lightweight, compact, and easy to pack in my carry-on bag. I have a Sirui Carbon Fiber Tripod that bring with me when I travel for work and need to shoot video or have some night photography planed.
Disclosure: Some of the links above are affiliates. What this means is that we make a small commission if you choose to purchase them. As always, we don’t recommend anything we haven’t tried ourselves and hope that you found our review useful. Thank you for supporting The Travel Bite.

Leave a Reply