
This pear crisp recipe captures everything we love about the season as the leaves begin to change and the air carries that familiar crispness, drawing our kitchens naturally toward the comforting aromas of cinnamon, nutmeg, and baked fruit. There’s something satisfying about creating desserts that mirror the season. And while pumpkin and apple treats tend to get all the attention, this spiced pear crisp offers a delicious alternative, especially when brightened with tart cranberries that bridge the gap between autumn’s warmth and the festive holidays ahead.
There’s something wonderfully forgiving about a good fruit crisp. It’s the kind of dessert that welcomes you into the kitchen regardless of your baking experience. No need to worry about perfect measurements or finicky techniques here. As it bubbles away in the oven, filling every corner of your home with the scent of warm spices and caramelized fruit, you’ll find yourself already anticipating that first spoonful. It’s comfort food at its finest, the sort of dessert that naturally draws everyone to gather around the table just as the seasons begin to shift toward the holidays.
The combination of tender, juicy pears with a crunchy oat topping adds that satisfying textural contrast we all crave. Whether you’re hosting your first dinner party of the season or looking for the perfect ending to a cozy family meal, this pear crisp recipe delivers warmth and satisfaction without the fuss of more complicated desserts.
Why Pear Crisp is the Season’s MVP Dessert
While apples certainly have their devoted autumn following, there’s something wonderfully understated about turning to pears instead. They offer a gentler sweetness and that wonderfully buttery texture that feels almost luxurious, yet still perfectly at home in a rustic dessert.
Fall happens to be when pears are at their absolute best. Their subtle flavor has this beautiful way of embracing classic spices like cinnamon and nutmeg without being overpowered, while those jewel-toned cranberries scattered throughout add just the right touch of tartness and visual drama to make each forkful feel special.
From a practical standpoint, this pear crisp recipe checks all the boxes for busy fall schedules. It requires minimal prep time, uses simple pantry ingredients, and can be assembled ahead of time. It’s perfect for those hectic weeks leading up to holiday gatherings. Plus, it serves a crowd without breaking the budget, making it an ideal choice for potlucks, family reunions, or casual entertaining.
The Perfect Pear: Choosing Your Fruit
Not all pears are created equal when it comes to baking, and selecting the right variety can make the difference between a soggy disappointment and a perfectly textured crisp. The key is choosing pears that hold their shape during the baking process while still becoming tender and flavorful.
Bosc pears are the gold standard for baking, offering a firm texture that won’t turn to mush in the oven. Their slightly grainy texture actually works in your favor, creating beautiful, distinct pieces that maintain their integrity throughout the baking process.
Anjou pears are another excellent choice, providing similar baking qualities with a slightly sweeter flavor profile.
Bartlett pears can work wonderfully if they’re not overly ripe. Look for fruit that yields slightly to pressure but still feels firm. Avoid very soft pears or varieties like Comice that tend to break down too much during baking.
The ripeness factor is crucial. Your pears should be ripe enough to slice easily and offer good flavor, but still firm enough to hold their shape. If your pears are underripe, simply leave them on the counter for a day or two before using them in your pear crisp recipe.
Building the Perfect Crisp Topping
The topping is where a good crisp becomes truly exceptional. This pear crisp recipe’s combination of old-fashioned oats, flour, and brown sugar creates the ideal balance of sweetness and texture, while cold butter pieces ensure those coveted golden, crunchy clusters that make every bite memorable.
The secret to achieving the perfect topping texture lies in keeping your butter cold and working it into the dry ingredients just until the mixture resembles coarse crumbs. This technique creates pockets of butter that will melt during baking, resulting in that irresistible combination of tender and crispy textures.
Old-fashioned oats are essential here. Don’t substitute quick oats, which will break down too much during baking. The hearty texture of rolled oats provides substance and creates those satisfying clusters that contrast beautifully with the soft fruit beneath.

Make-Ahead Magic for Busy Schedules
One of the best things about this pear crisp? It’s practically made for busy schedules and spontaneous gatherings. You can put the whole thing together a full day ahead, tuck it into the refrigerator, and simply slide it into the oven when you’re ready. During those hectic holiday weeks when your oven is working overtime and every spare moment counts, this kind of flexibility feels like a small miracle.
And if you’re thinking even further ahead, this crisp is a freezer’s best friend. Assemble everything just as you normally would, wrap it up well, and stash it away for up to two months. When company drops by unexpectedly or you find yourself needing dessert at the last minute, just pop it straight from freezer to oven. There’s no thawing required, just an extra 10 or 15 minutes of baking time. It’s like having your own secret stash of homemade comfort, ready whenever life calls for something sweet.
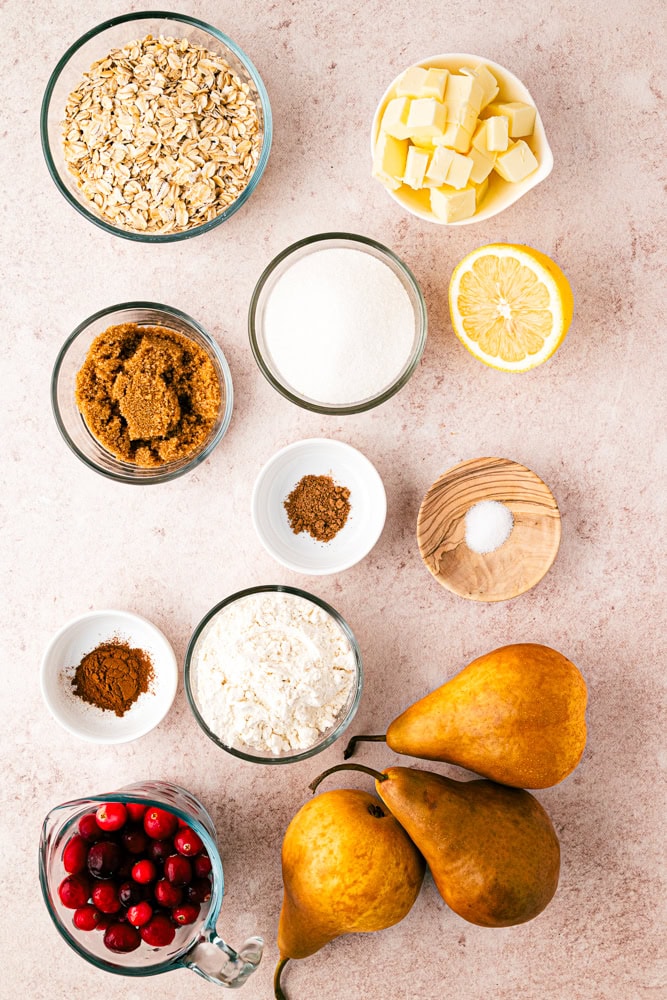
Spiced Pear Crisp Ingredients List
Here’s a list of everything you’ll need to gather to make this pear crisp! If you’re ready to get started, simply hit the “jump to recipe” button for precise measurements and a printable recipe. Or scroll through for extra tips and step-by-step photos.
- pears
- cranberries (optional)
- granulated sugar
- all-purpose flour
- ground cinnamon
- ground nutmeg
- lemon juice
- old-fashioned rolled oats
- light brown sugar
- ¼ teaspoon salt
- unsalted butter
Pear Crisp Recipe Step-By-Step
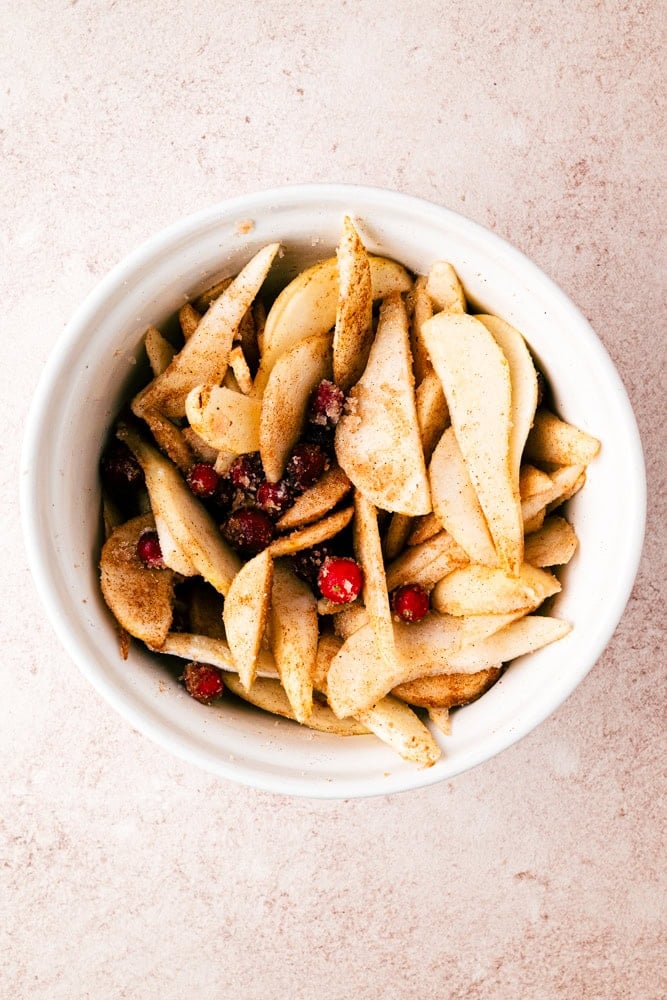
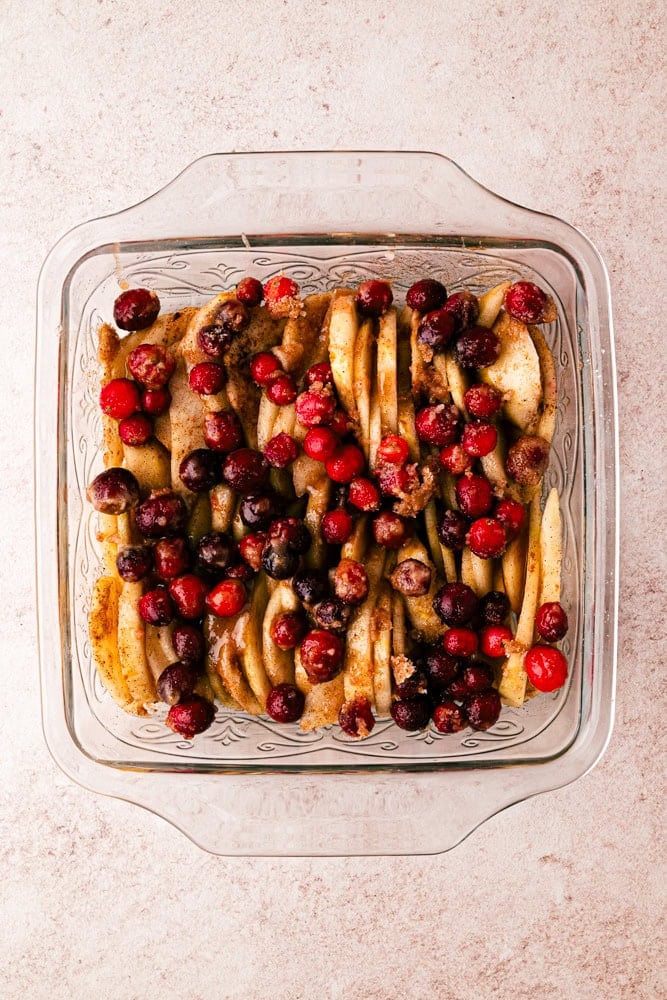
Preheat your oven to 350°F and lightly grease a 9×9-inch baking dish. In a large bowl, combine the sliced pears, cranberries, granulated sugar, flour, cinnamon, nutmeg, and lemon juice. Toss gently to coat the fruit evenly, then transfer to your prepared baking dish and spread out evenly.
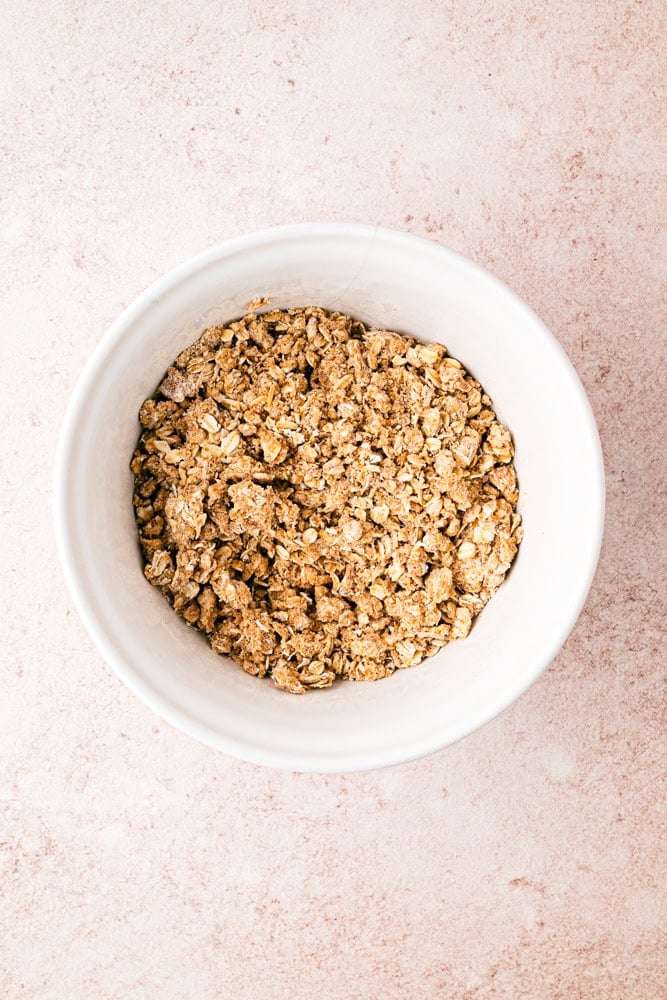
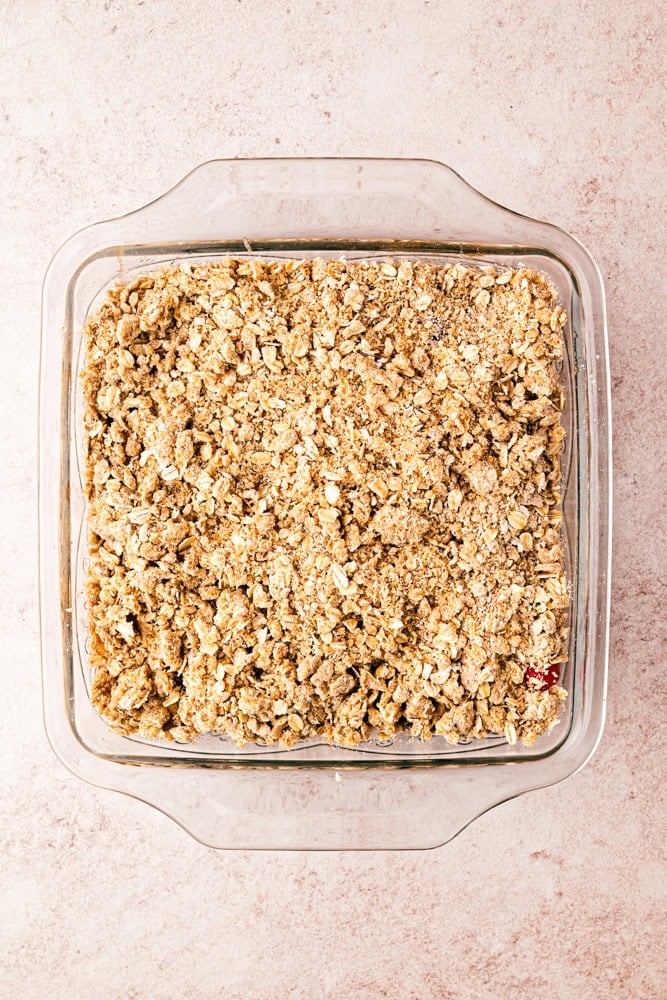
In a separate bowl, mix the oats, flour, brown sugar, cinnamon, and salt. Add the cold butter pieces and use a pastry cutter or fork to blend until the mixture resembles coarse crumbs.
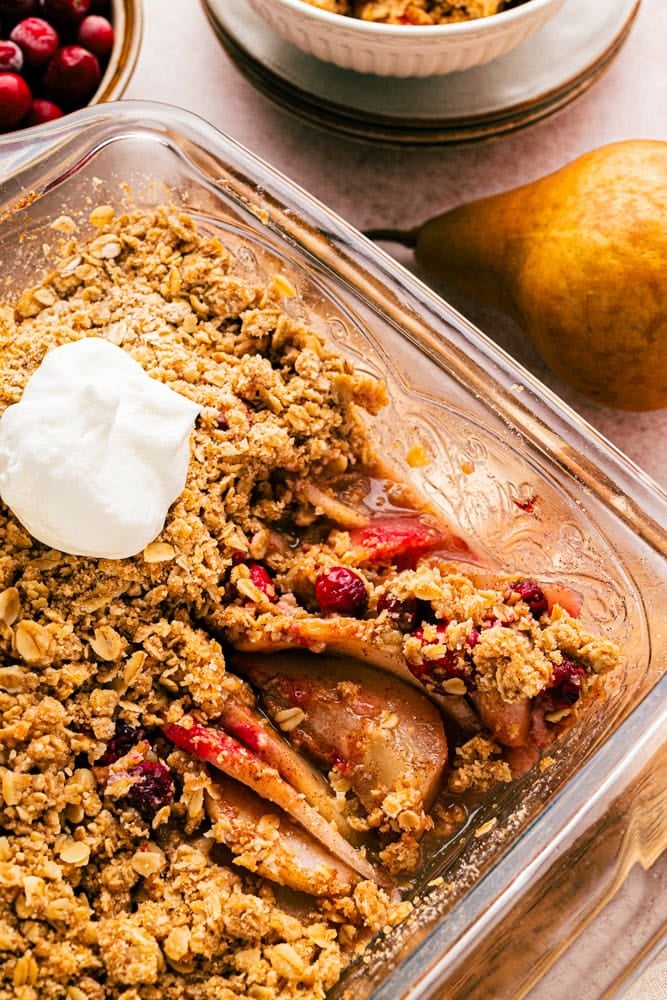
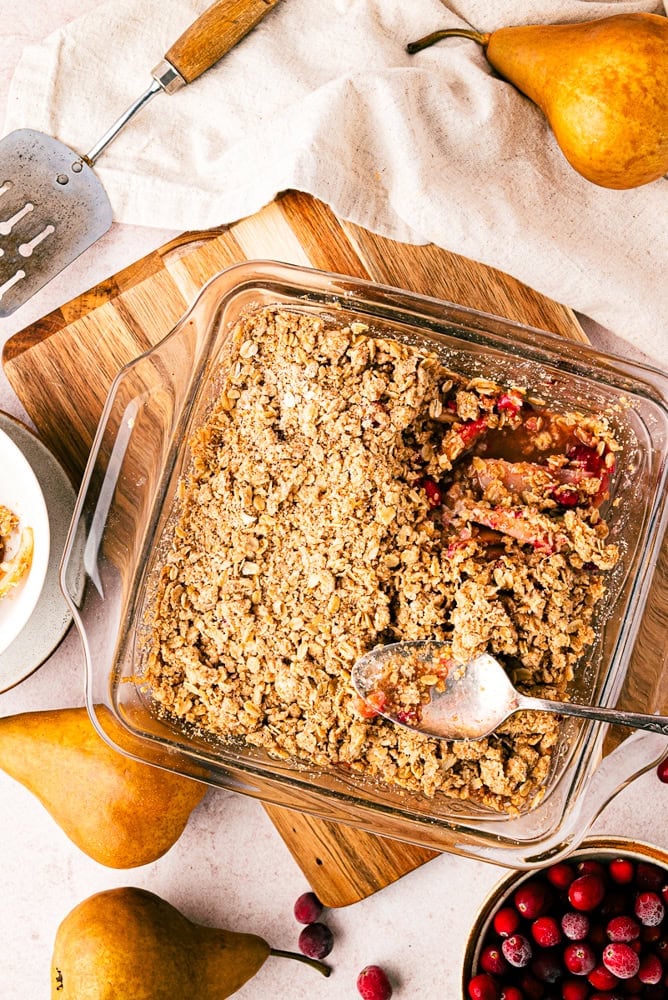
Sprinkle the crisp topping evenly over the fruit layer. Bake for 45 to 55 minutes, or until the topping is golden brown and the fruit mixture is bubbling around the edges.
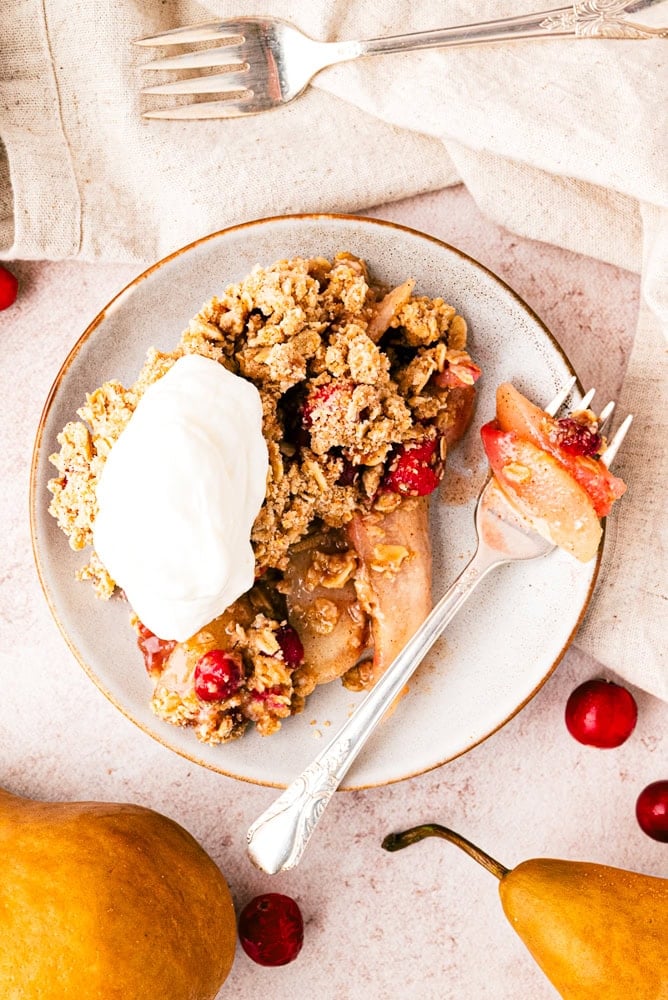
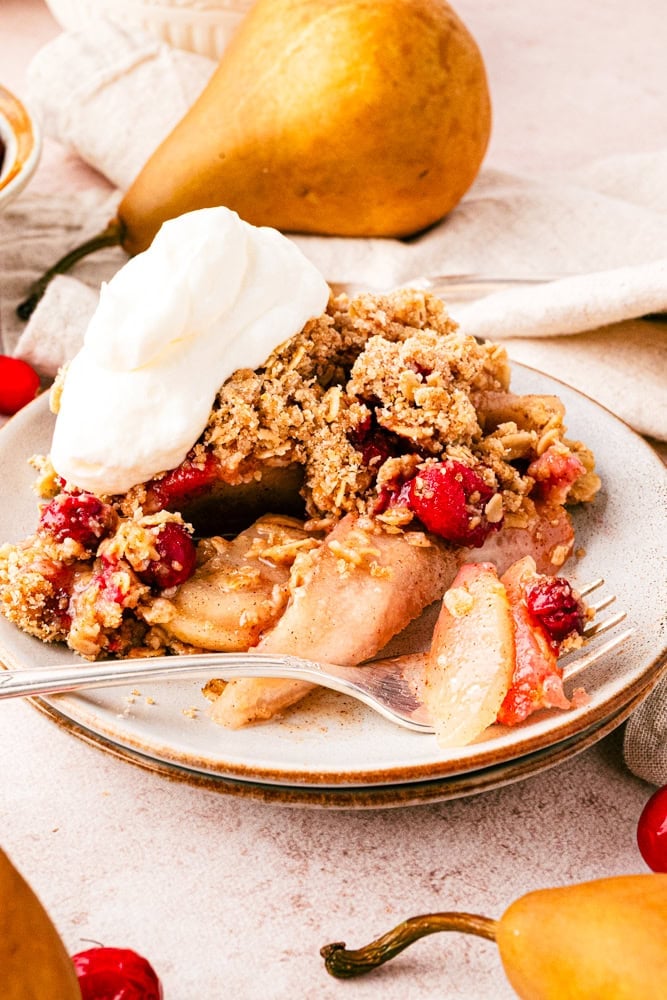
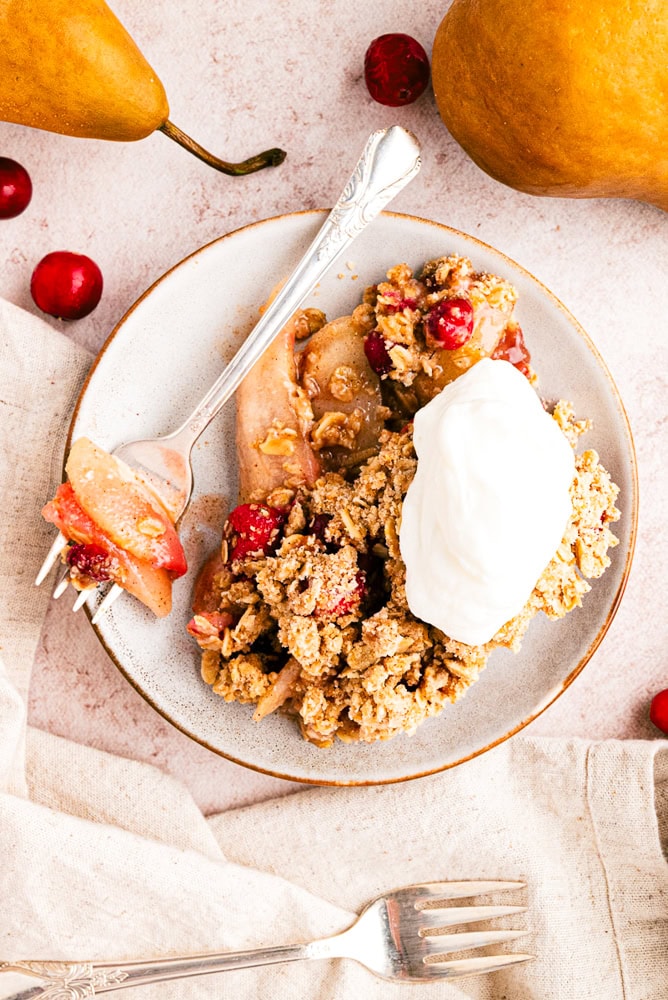
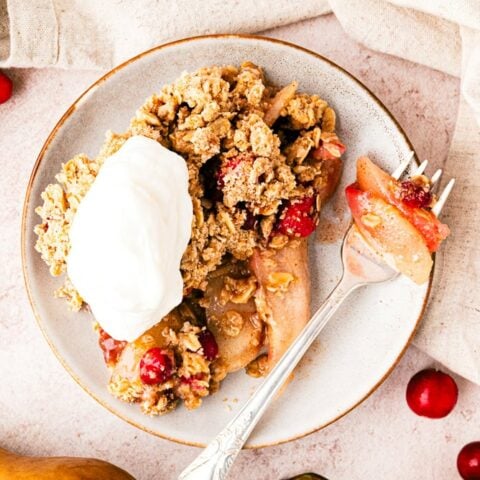
Remove from the oven and let cool for 10 to 15 minutes before serving. Serve warm, optionally topped with vanilla ice cream, whipped cream, or a drizzle of maple syrup.
Serving and Storage Tips
This pear crisp is absolutely delicious served warm from the oven, but it’s equally enjoyable at room temperature or even chilled the next day. For the ultimate indulgence, serve it warm with a scoop of vanilla ice cream. The contrast between the warm, spiced fruit and cold, creamy ice cream is simply divine.
Store any leftovers covered in the refrigerator for up to three days. To reheat, simply pop individual portions in the microwave or warm the entire dish in a 325°F oven until heated through.
The Perfect Fall Finale
As we settle into the rhythm of shorter days and longer evenings, there’s something deeply satisfying about desserts that celebrate the season’s natural gifts. This spiced pear crisp is exactly that kind of treat, the sort that draws everyone to the kitchen with its incredible aromas and keeps them lingering around the table long after the last bite.
Whether you’re putting together your Thanksgiving spread, welcoming friends over for a cozy dinner, or simply wanting to make an ordinary Tuesday feel a little more special, this crisp has a way of turning any moment into something memorable. I love desserts that don’t demand perfection or complicated techniques, just good ingredients and the kind of care that comes naturally when you’re baking for friends and family.
So when you spot those gorgeous pears at the market, don’t hesitate. Bring them home, let the season inspire you, and create something that captures all the warmth and comfort of autumn in one beautiful, bubbling dish that’s sure to become a new fall tradition.
Pear Crisp
Ingredients
- 4 cups pears, peeled, cored, and sliced pears (about 3 medium pears, Bosc were used here)
- 1 cup fresh or frozen cranberries
- ½ cup granulated sugar
- 2 tablespoons all-purpose flour
- 1 teaspoon ground cinnamon
- ¼ teaspoon ground nutmeg
- 1 teaspoon lemon juice
- 1 cup old-fashioned rolled oats
- ½ cup all-purpose flour
- ⅓ cup packed light brown sugar
- ½ teaspoon ground cinnamon
- ¼ teaspoon salt
- 6 tablespoons unsalted butter, cold and cut into small pieces
Instructions
- Preheat the oven to 350°F. Lightly grease the 9x9-inch baking dish.
- In a large bowl, combine sliced pears, cranberries, granulated sugar, flour, cinnamon, nutmeg, and lemon juice. Toss gently to coat the fruit evenly. Transfer the mixture to the prepared baking dish and spread out evenly.
- In another bowl, mix the oats, flour, brown sugar, cinnamon, and salt.
- Add the cold butter pieces and use a pastry cutter or fork to blend until the mixture resembles coarse crumbs.
- Sprinkle the crisp topping evenly over the fruit layer.
- Bake for 45 to 55 minutes, or until the topping is golden brown and the fruit mixture is bubbly. Remove from the oven and let cool for 10 to 15 minutes before serving.
- Serve warm, optionally topped with vanilla ice cream, whipped cream, or a drizzle of maple syrup.
Notes
- For the best texture and flavor, choose firm, ripe pears that hold up well to baking.
- Best Varieties: Bosc, Anjou, or Bartlett
- Avoid overly soft or mealy pears like very ripe Bartletts or Comice, which may break down too much during baking.
- If your pears are underripe, allow them to ripen at room temperature for a couple of days before using.
- You can choose to peel or not peel your pears, just wash them well if you’re not peeling them, and know that the peel will have a different texture than the fruit after baking.
Leave a Reply